Showing posts with label your. Show all posts
Showing posts with label your. Show all posts
Tuesday, February 17, 2015
Pros and Cons of Interviewing Bloggers on your Blog

For some people bloggingis a way of life; they like producing content that stimulates conversation while also informing readers about a particular topic. In order to stay motivated, a blogger must get traffic by producing quality content and practicing tried and true techniques. One of these techniques is to interview another blogger or an individual who has authority in the same niche as you to provide a different perspective to your readers, which adds value. While this technique is effective, there are also some costs that go along with it. This article will go over the benefits and costs of interviewing bloggers for your blog.
Also Read: How to Choose the Right Theme for Your Blog?
Also Read: The 3 Basic Things You Should Know Before Creating a Blog to Become a Successful Blogger
Pros
As stated previously, one of the main benefits in interviewing bloggers for your blog is that your readers get to hear a different voice than the one theyre used to. While you’re the one asking the questions, the bulk of the content will be transcribed in the voice of the interviewee. This gives your audience real insight into what a person is thinking and allows them formulate opinions based on how another thinks, not just you. The immediate benefit to this is that your readers will feel like your blog is a place of discussion and exploration rather than a dictatorship ran by a person behind a computer.
Another benefit of interviewing bloggers on your blog is that you get real-life contact with the person if it’s a face-to-face interview. If start corresponding with other bloggers in your niche and become friendly, these good feelings go to a different level once you meet and chat about the issues. What this does overtime is allow your name and blog pop up in that person’s mind whenever they encounter something dealing with your topic, giving you a great lead source.
Cons
As with most things that produces a benefit, there is a cost to it. One of the costs of interviewing bloggers to your blog is that you may simply be a poor interviewer. Having good interviewing skills is different than knowing about a topic. So if you have poor interviewing skills and your readers discover this it will bring down some of your authority. If a person can’t ask the right questions to a person, will they be able to ask the right questions about a topic? This line of thought can lose your readers.
Also Read: The Top 10 Websites to create free Logo for your Blog
Another cost to interviewing bloggers on your blog is that you can ruffle some feathers with your peers. In order to get traffic, one must network with others so that they can exchange links, guest posts, and other things. If you interview a person and it turns out that you have an agenda or that your lines of questions go into unpleasant territory, knowingly or unknowingly, then you can lose the trust--or worse respect--of that individual. Being able to gracefully navigate a variety of topics and issues is a requirement for interviewing.
Conclusion
While there are benefits and costs to interviewing bloggers on your blog, the former outweigh the latter. You can’t be scared of what might happen and forego the benefits that could happen.
Author Bio:
This is a guest post written by Tarun Jaitely, He is a blogger and writes about Make Money Online, Blogging, SEO, Reviews. He recommends you to check out his latest review about sensational wordpresstheme from MyThemeShopon his blog.

Saturday, February 14, 2015
Getting Your Machines MAC address
Reserving an IP address on ur network?
*You will need to register all MAC addresses in cases where you have both wired and wireless interface in your system.
Windows XP
Run ipconfig/all from a Command Prompt window.
(click Start, then Run, then type cmd in the text box.)
Type in ipconfig/all in the Command Prompt Windows.
The 12-digit Physical Address is the same as MAC address

Read more »
*You will need to register all MAC addresses in cases where you have both wired and wireless interface in your system.
Windows XP
Run ipconfig/all from a Command Prompt window.
(click Start, then Run, then type cmd in the text box.)
Type in ipconfig/all in the Command Prompt Windows.
The 12-digit Physical Address is the same as MAC address
Thursday, February 5, 2015
Huawei Ascend Y600 20 Stock ROM Firmware to unbrick your phone
Huawei Ascend Y600-U20 Firmware, this firmware is already tested. You can check out the comment box for confirmation.

Firmware Here --> Huawei Y600-U20
VCOM Driver --> Manual Install Driver
Alternative Driver --> AutoInstaller
SPFlashTool --> SPFlashTool
SPFlashTool --> Latest Version
"Extract the files to your desired folder"
Installing Driver
You need to install the driver manually. You need to go to device manager and when there is a new device detected install the proper driver. Must be quick when the new device is detected, it will only last 3 seconds in some devices.
Reference Video for Installing Driver
Reference Video Flashing your phone
Flashing
1. Launch FlashTool
2. Click on Scatter-Loading, and load your scatter file. (see example below with loaded file in Flash Tool

 Reference Video using Flashtool version 5.xxx (watch it in HD)
3. After you load the file, press F9 or Press Download to Flash your Phone.
4. If Download is not possible, you can press Firmware Upgrade.
"Hard reset your phone after flashing"
I hope this tutorial help you. Please drop a comment if something is not clear to you.
Read more »
Firmware Here --> Huawei Y600-U20
VCOM Driver --> Manual Install Driver
Alternative Driver --> AutoInstaller
SPFlashTool --> SPFlashTool
SPFlashTool --> Latest Version
"Extract the files to your desired folder"
Installing Driver
You need to install the driver manually. You need to go to device manager and when there is a new device detected install the proper driver. Must be quick when the new device is detected, it will only last 3 seconds in some devices.
Reference Video for Installing Driver
Reference Video Flashing your phone
Flashing
1. Launch FlashTool
2. Click on Scatter-Loading, and load your scatter file. (see example below with loaded file in Flash Tool
3. After you load the file, press F9 or Press Download to Flash your Phone.
4. If Download is not possible, you can press Firmware Upgrade.
5. After you press Download or Firmware Upgrade re-insert your battery and connect your Phone to the PC. Press Volume Down or Volume Up while connecting to PC.
"Hard reset your phone after flashing"
I hope this tutorial help you. Please drop a comment if something is not clear to you.
Wednesday, February 4, 2015
Hard Reset your Lenovo A60 and remove password pattern lock gmail account
Lenovo phones are a bit rare in my area, but this Lenovo A60+ came by with gmail account lock up. Ill be providing a tutorial to hard reset your Lenovo A60+ this will be an easy one :D

Hard resetting / factory resetting your phone will solve the following issues:
1. If you forgot your pattern lock
2. If you forgot your gmail account
3. If you forgot your password
4. Apps that automatically force closing
5. Stuck in Lenovo Logo (sometimes does not work if the firmware is totally damage)
NOTE: Performing hard reset will erase your data.
To hard reset:
1. Turn off your phone.
2. Press and Hold VOLUME UP + Power button. Keep pressing the button until an Android robot appear in you screen. Press HOME capacitive key to activate Android System Recovery
3. Android System Recovery will appear.
4. Select wipe / factory reset, press Volume rocker to navigate and press the MENU Key (left capacitive key) to confirm your selection
5. Reboot your phone.
Note:
If performing hard reset did not succeed, you need to wipe the cache first in the android system recovery before performing wipe / factory reset.
I hope this tutorial helps you.. If you have any question just drop a
comment.
Read more »
Hard resetting / factory resetting your phone will solve the following issues:
1. If you forgot your pattern lock
2. If you forgot your gmail account
3. If you forgot your password
4. Apps that automatically force closing
5. Stuck in Lenovo Logo (sometimes does not work if the firmware is totally damage)
NOTE: Performing hard reset will erase your data.
To hard reset:
1. Turn off your phone.
2. Press and Hold VOLUME UP + Power button. Keep pressing the button until an Android robot appear in you screen. Press HOME capacitive key to activate Android System Recovery
3. Android System Recovery will appear.
4. Select wipe / factory reset, press Volume rocker to navigate and press the MENU Key (left capacitive key) to confirm your selection
5. Reboot your phone.
Note:
If performing hard reset did not succeed, you need to wipe the cache first in the android system recovery before performing wipe / factory reset.
I hope this tutorial helps you.. If you have any question just drop a
comment.
Sunday, February 1, 2015
Cherry Mobile Thunder 2 0 Stock rom firmware to unbrick your phone
Hey,
For those who are looking for the Cherry Mobile Thunder 2.0 firmware or stock rom for your phone here it is.
For those who are looking for the Cherry Mobile Thunder 2.0 firmware or stock rom for your phone here it is.

Firmware Here -->Cherry Mobile Thunder
Part 2 -- > Firmware Part 2
Part 3 --> Firmware Part 3
VCOM Driver -->VCOM Manual
Alternative Driver --> AutoInstaller
Alternative Driver --> AutoInstaller
SPFlashTool --> LatestVersion
Use 7zip to extract the file
"Extract the files to your desired folder" See picture below"
"If you encounter error in flashtool, use different version of it."

Installing Driver
First try the Alternative Driver, which is the AutoInstaller. Just open the install.bat then it will automatically install the driver. Then proceed to flashing. If it did not work then proceed with VCOM driver that you had downloaded. Then install it manually follow the guide below.
Video Reference using Driver Auto Installer (watch in HD)
When installing it manually your phone must be turned off, then connect it to your computer/laptop while pressing VOLUME UP or VOLUME DOWN. This will detect and look for the driver.

1. This is the first time that you will connect your phone and it will search for the correct driver.

2. Check include this location ... ... and click on browse. Look for USB VCOM Driver and Click on 2K_XP_COM folder if you are using Windows XP or Win7 for Windows 7 and then press OK when you are done picking the right folder for the driver.

3. If the driver is successfully installed MediaTek DA USB VCOM will appear in the New Hardware Wizard.
Video Installing VCOM Driver (please watch in HD)
Video Flashing your phone (please watch in HD)
Flashing
1. Launch FlashTool
2. Click on Scatter-Loading, and load your scatter file. (see example below with loaded file in Flash Tool
Video Reference Using FlashTool version 5.xxx (watch in HD)
3. After you load the file, press F9 or Press Download to Flash your Phone.
4. If Download is not possible, you can press Firmware Upgrade.
5. After you press Download or Firmware Upgrade re-insert your battery and connect your Phone to the PC. Press Volume Down or Volume Up while connecting to PC.
"Hard reset your phone after flashing"
I hope this tutorial help you. Please drop a comment if something is not clear to you.
Cherry Mobile Sapphire 2 0 Stock ROM firmware to unbrick your phone
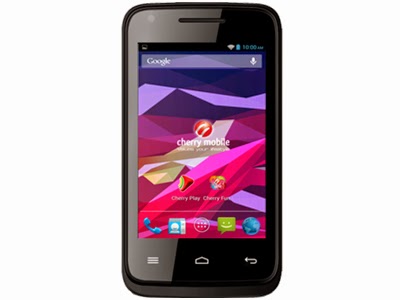
The much awaited firmware for Cherry Mobile Sapphire 2.0 is here. You can now fix your bootlooped or softbricked phones. Thank you for those who shared this firmware. To check if your sapphire is version 2, check it at the back of your phone, near IMEI section.
Read more »
If you do not have the driver. I also provide the driver. Or you can go to my Tools section and find MTK SPD Driver.
TOOLS
ResearchDownload --> DOWNLOAD HERE
Firmware --> Download HERE
Driver -- > DOWNLOAD HERE
DOWNLOAD THE FILES, AND EXTRACT. INSTALL DRIVER.
To install the driver
1. To fully flash your phone
2. To remove password, pattern lock, and gmail account.
TO remove password, pattern lock and gmail account.
1. Open Researchdownload
2. Load packet and look for file(first button)
3. Check only the following
✓FDL1✓FDL2✓UserData
4. Click in calibration/backup page, and UNCHECK ALL and press OK
5. And lastly press the Play button to continue flashing.
TO fully flash your phone.
1. Open Researchdownload
2. Load packet and look for file(first button)
3. Remove check in the following selection
✓EraseRuntimeNV
✓PHASE_CHECK
✓EraseCache
✓EraseData
✓EraseMisc
4. Click in Calibration/BACK UP page, and UNCHECK ALL and press OK
5. Press Play button
6. Press and Hold VOLUME UP and VOLUME DOWN and insert USB cable. (your phone must be turned off)
7. Repeat number 6 if your phone is not detected by researchdownload.
8. If detected by research download just wait until the flashing is done and it should reboot your phone automatically.
I hope this tutorial help you recover your phone :)
For 32bit WINDOWS OS only.
TOOLS
ResearchDownload --> DOWNLOAD HERE
Firmware --> Download HERE
Driver -- > DOWNLOAD HERE
DOWNLOAD THE FILES, AND EXTRACT. INSTALL DRIVER.
To install the driver
- Extract SPD SCI-android-usb-driver.zip anywhere you want
- Open SPD SCI-android-usb-driver
- Open x86 folder
- Open DPInst.exe this will install the driver.
1. To fully flash your phone
2. To remove password, pattern lock, and gmail account.
TO remove password, pattern lock and gmail account.
1. Open Researchdownload
2. Load packet and look for file(first button)
3. Check only the following
✓FDL1✓FDL2✓UserData
4. Click in calibration/backup page, and UNCHECK ALL and press OK
5. And lastly press the Play button to continue flashing.
TO fully flash your phone.
1. Open Researchdownload
2. Load packet and look for file(first button)
3. Remove check in the following selection
✓EraseRuntimeNV
✓PHASE_CHECK
✓EraseCache
✓EraseData
✓EraseMisc
4. Click in Calibration/BACK UP page, and UNCHECK ALL and press OK
5. Press Play button
6. Press and Hold VOLUME UP and VOLUME DOWN and insert USB cable. (your phone must be turned off)
7. Repeat number 6 if your phone is not detected by researchdownload.
8. If detected by research download just wait until the flashing is done and it should reboot your phone automatically.
I hope this tutorial help you recover your phone :)
Friday, January 30, 2015
Check Your Mobile is Genuine or Fake


Mobile Markets are full with Fake Phones and mobiles are being sold as original even with Branded tags next to it the replica phones are kept in the market that looks similar to the original phone, to make sure whether your phone is original or fake there would be two ways of checking it. These methods will help you during purchasing a used cell phone.
Check the following Features:
Be alert about the spellings for example Soniericsson, Nokia and Samsung
Warranties: Always ask for 12 months warranty certificate from the phone manufacturers; never trust on an oral agreement with the seller. Fake phones come with a short warranty periods as counterfeiters cannot give guarantee it will last so long.
Check handset in all aspects completely: Some people take phones home without testing it first. Some dealers make you fool and encourage this, knowing the handset is fake. As you check it out, you might observe some points of low performance or other issues such as memory which is cheap quality photos.
Appearances: like dull colours, screen size, quality of printing and paint finish, Fake built quality difference in weight, logos, location of buttons and battery, missing functions, quality control and holograms and lack of quality.
The other method is examining or checking Phones quality through 15 digit IMEI code
Dial *#06#
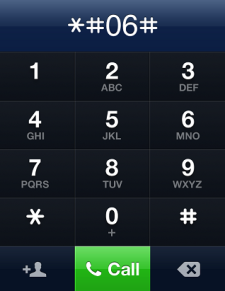
IMEI stands for ( International Mobile Equipment Identity). This is a 15-digit number and might be found in the packet of the mobile phone as well. It might be found by eliminating the back cover and it might be located on the battery.
The IMEI number may be as below:
IMEI CODE
3 6 9 3 9 5 0 1 2 3 5 5 6 7 8
Now view the 7th and 8th digit. These two digits will make sure your phone’s quality!
- If the seventh and eighth digits are 00 this shows your cell phone is made in Original Factory which makes sure the best quality.
- If the seventh and eighth digits are 01 or 10 this shows your cell phone is made in Finland which is best quality.
- If the seventh and eighth digits are 13 this shows your cell phone is gathered in Azerbaijan which is too bad. And it is also unsafe and dangerous for health!
- If the seventh and eighth digits are 02 or 20 this shows your cell phone is gathered in Emirates which is very cheap quality. If the seventh and eighth digits are either 03/30 04/40, this shows your phone is manufactured in China but its good quality. But is bad either as 00, 01 or 10.
- If the seventh and eighth digits are 05 or 50 this shows your cell phone is made either in Brazil or USA or Finland.
- If the seventh and eighth digits are 06 or 60 this shows your cell phone is made either in Hong Kong, or China or Mexico
- If the seventh and eighth digits are 08 or 80 this shows your cell phone is made in Germany which is good and fair quality.
- This will help and facilitate you to select the good one but these tips might not work with the Sony Erickson Mobile Phone.
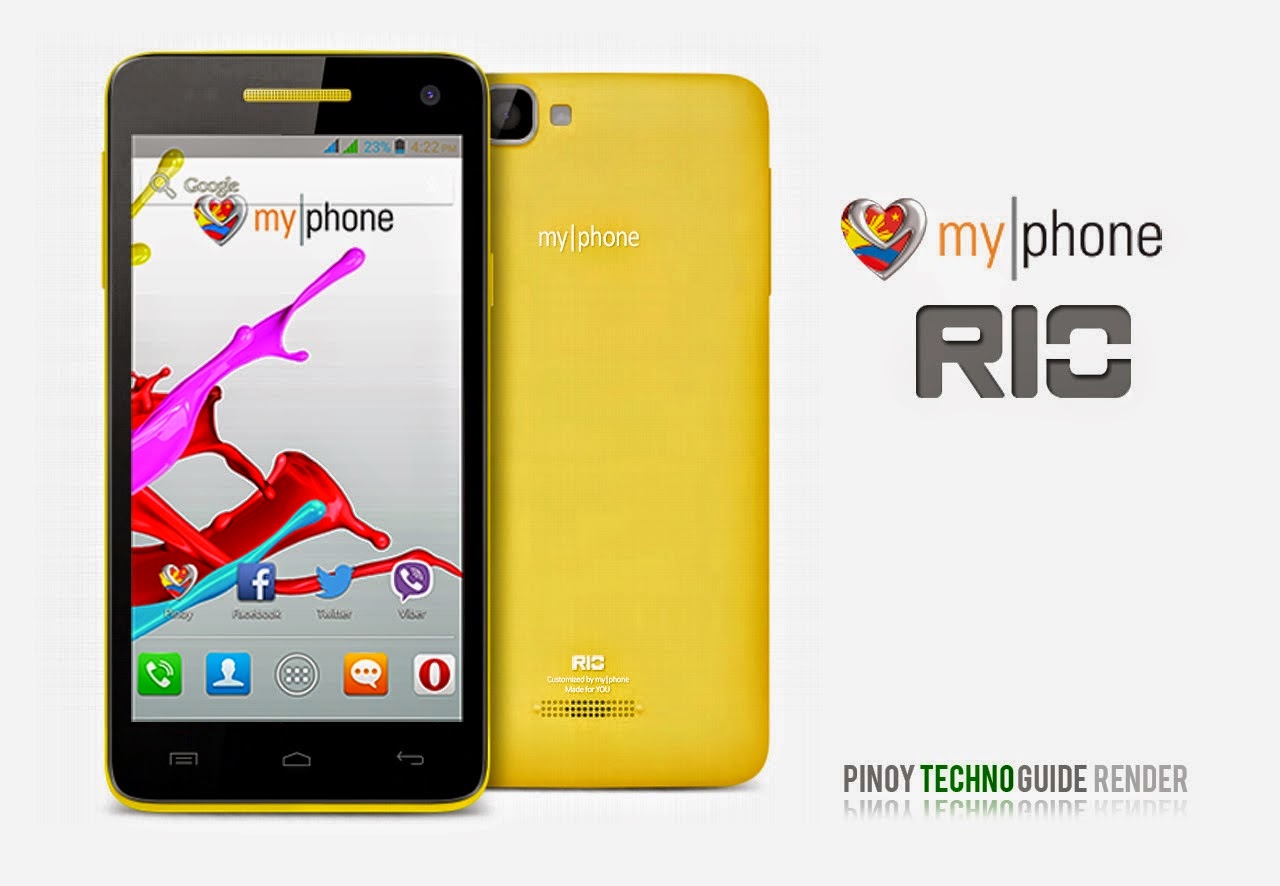
Hard Reset your MyPhone Rio and remove password pattern lock and gmail account
A colossal phone it is, the MyPhone RIO drop by in my workstation, and made a tutorial in Hard Resetting your MyPhone RIO.
Hard resetting / factory resetting your phone will solve the following issues:
1. If you forgot your pattern lock
2. If you forgot your gmail account
3. If you forgot your password
4. Apps that automatically force closing
5. Stuck in MyPhone Logo (sometimes does not work if the firmware is totally damage)
NOTE: Performing hard reset will erase your data.
To hard reset:
1. Turn off your phone
2. Press and Hold VOLUME UP + VOLUME DOWN+ Power button simultaneously. Press VOLUME UP go to RECOVERY MODE
3. Press Power Button to activate Android System Recovery
4. Select wipe / factory reset, press Volume rocker to navigate and press the MENU Key to confirm the selection.
5. Reboot your phone.
Note: If performing hard reset did not succeed, you need to wipe the cache first in the android system recovery before performing wipe / factory reset.
I hope this tutorial helps you.. If you have any question just drop a comment.
Read more »
Hard resetting / factory resetting your phone will solve the following issues:
1. If you forgot your pattern lock
2. If you forgot your gmail account
3. If you forgot your password
4. Apps that automatically force closing
5. Stuck in MyPhone Logo (sometimes does not work if the firmware is totally damage)
NOTE: Performing hard reset will erase your data.
To hard reset:
1. Turn off your phone
2. Press and Hold VOLUME UP + VOLUME DOWN+ Power button simultaneously. Press VOLUME UP go to RECOVERY MODE
3. Press Power Button to activate Android System Recovery
4. Select wipe / factory reset, press Volume rocker to navigate and press the MENU Key to confirm the selection.
5. Reboot your phone.
Note: If performing hard reset did not succeed, you need to wipe the cache first in the android system recovery before performing wipe / factory reset.
I hope this tutorial helps you.. If you have any question just drop a comment.
Wednesday, January 28, 2015
Remove password pattern lock gmail account in your Samsung Galaxy S3 Mini i8190
Check out this new tutorial for Samsung Galaxy S3 Mini (i8190). This will remove pattern lock, gmail account, and password in your Samsung Galaxy S3 Mini.

Hard resetting / factory resetting your phone will solve the following issues:
1. If you forgot your pattern lock
2. If you forgot your gmail account
3. If you forgot your password
4. Apps that automatically force closing
5. Stuck in Samsung Logo (sometimes does not work if the firmware is totally damage)
NOTE: Performing hard reset will erase your data.
To hard reset:
1. Turn off your phone
2. Press and Hold Volume UP + Home Button + Power Button simultaneously
3. Release the buttons when you see the Samsung Galaxy Logo
4. Android System Recovery should appear
5. Select wipe / factory reset, to navigate press the Volume Rocker, to select press Power Button
6. Reboot your phone.
Note: If Power Button did not work in selecting in Android System Reocvery, use HOME Button. If performing hard reset did not succeed, you need to wipe the cache first in the android system recovery before performing wipe / factory reset.
I hope this tutorial helps you.
Read more »
Hard resetting / factory resetting your phone will solve the following issues:
1. If you forgot your pattern lock
2. If you forgot your gmail account
3. If you forgot your password
4. Apps that automatically force closing
5. Stuck in Samsung Logo (sometimes does not work if the firmware is totally damage)
NOTE: Performing hard reset will erase your data.
To hard reset:
1. Turn off your phone
2. Press and Hold Volume UP + Home Button + Power Button simultaneously
3. Release the buttons when you see the Samsung Galaxy Logo
4. Android System Recovery should appear
5. Select wipe / factory reset, to navigate press the Volume Rocker, to select press Power Button
6. Reboot your phone.
Note: If Power Button did not work in selecting in Android System Reocvery, use HOME Button. If performing hard reset did not succeed, you need to wipe the cache first in the android system recovery before performing wipe / factory reset.
I hope this tutorial helps you.
MyPhone Rio Fun Stock ROM to unbrick your phone
Hey ho!,Im done uploading the stock rom for MyPhone Rio Fun, this is the second firmware that I will gonna upload for today.

Firmware Here -->MyPhone Rio Fun v1
Firmware Here --> MyPhone Rio Fun v2
VCOM Driver -->VCOM Manual
Alternative Driver --> AutoInstaller
VCOM Driver -->VCOM Manual
Alternative Driver --> AutoInstaller
SPFlashTool --> SPFlashTool
SPFlashTool --> LatestVersion
"Extract the files to your desired folder" See picture below"
"You can use any of the Flashtool above"
Installing Driver
First try the Alternative Driver, which is the AutoInstaller. Just open the install.bat then it will automatically install the driver. Then proceed to flashing. If it did not work then proceed with VCOM driver that you had downloaded. Then install it manually follow the guide below.
Video Reference using Driver Auto Installer (watch in HD)
When installing it manually your phone must be turned off, then connect it to your computer/laptop while pressing VOLUME UP or VOLUME DOWN. This will detect and look for the driver.
1. This is the first time that you will connect your phone and it will search for the correct driver.
2. Check include this location ... ... and click on browse. Look for USB VCOM Driver and Click on 2K_XP_COM folder if you are using Windows XP or Win7 for Windows 7 and then press OK when you are done picking the right folder for the driver.
3. If the driver is successfully installed MediaTek DA USB VCOM will appear in the New Hardware Wizard.
Video Installing VCOM Driver (please watch in HD)
Video Flashing your phone (please watch in HD)
Flashing
1. Launch FlashTool
2. Click on Scatter-Loading, and load your scatter file. (see example below with loaded file in Flash Tool
Video Reference Using FlashTool version 5.xxx (watch in HD)
3. After you load the file, press F9 or Press Download to Flash your Phone.
3. After you load the file, press F9 or Press Download to Flash your Phone.
4. If Download is not possible, you can press Firmware Upgrade.
5. After you press Download or Firmware Upgrade re-insert your battery and connect your Phone to the PC. Press Volume Down or Volume Up while connecting to PC.
"Hard reset your phone after flashing"
I hope this tutorial help you. Please drop a comment if something is not clear to you.
Fly IQ430 Evoke Stock ROM firmware to unbrick your phone
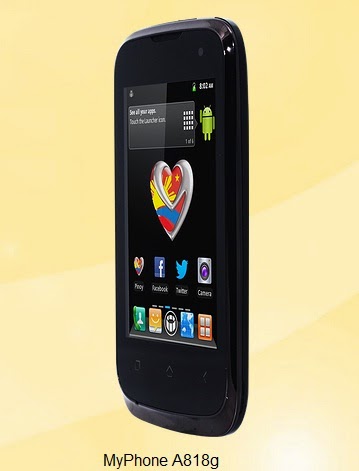
This post will work in Fly IQ430 because this is the original rom for this phone. I copied this post from MyPhone A818g. Because that phone is a rebranded Fly IQ430.
This firmware is originally for Fly IQ430, but you can use this firmware in MyPhone A818g. So if you are going to flash this firmware your MyPhone A818g will be rebranded to Fly phone. The version of this firmware is 4.1.1. If this is your first time to flash your phone there is a tutorial that you can follow below.
You can fix the following issue in your phone:
1. Bootloop
2. Damaged System UI
3. TP Upgrade only
4. Dead phone but it is detected in computer
5. Remove Gmail Account / Password / Pattern Lock (Alternative Way)
Firmware Here -->MyPhone A818g
Part 2 --> Part 2
Part 3 --> Part 3
Part 4 --> Part 4
"Extract the files to your desired folder" See picture below"
"If you encounter error in flashtool, use different version of it."
Installing Driver
First try the Alternative Driver, which is the AutoInstaller. Just open the install.bat then it will automatically install the driver. Then proceed to flashing. If it did not work then proceed with VCOM driver that you had downloaded. Then install it manually follow the guide below.
Video Reference using Driver Auto Installer (watch in HD)
When installing it manually your phone must be turned off, then connect it to your computer/laptop while pressing VOLUME UP or VOLUME DOWN. This will detect and look for the driver.
1. This is the first time that you will connect your phone and it will search for the correct driver.
3. If the driver is successfully installed MediaTek DA USB VCOM will appear in the New Hardware Wizard.
Video Flashing your phone (please watch in HD)
Flashing
Video Reference Using FlashTool version 5.xxx (watch in HD)
3. After you load the file, press F9 or Press Download to Flash your Phone.
"Hard reset your phone after flashing"
I hope this tutorial help you. Please drop a comment if something is not clear to you.
Read more »
This firmware is originally for Fly IQ430, but you can use this firmware in MyPhone A818g. So if you are going to flash this firmware your MyPhone A818g will be rebranded to Fly phone. The version of this firmware is 4.1.1. If this is your first time to flash your phone there is a tutorial that you can follow below.
You can fix the following issue in your phone:
1. Bootloop
2. Damaged System UI
3. TP Upgrade only
4. Dead phone but it is detected in computer
5. Remove Gmail Account / Password / Pattern Lock (Alternative Way)
Firmware Here -->MyPhone A818g
Part 2 --> Part 2
Part 3 --> Part 3
Part 4 --> Part 4
VCOM Driver -->VCOM Manual
Alternative Driver --> AutoInstaller
Alternative Driver --> AutoInstaller
SPFlashTool --> SPFlashTool
SPFlashTool --> LatestVersion
"Extract the files to your desired folder" See picture below"
"If you encounter error in flashtool, use different version of it."
Installing Driver
First try the Alternative Driver, which is the AutoInstaller. Just open the install.bat then it will automatically install the driver. Then proceed to flashing. If it did not work then proceed with VCOM driver that you had downloaded. Then install it manually follow the guide below.
Video Reference using Driver Auto Installer (watch in HD)
When installing it manually your phone must be turned off, then connect it to your computer/laptop while pressing VOLUME UP or VOLUME DOWN. This will detect and look for the driver.
1. This is the first time that you will connect your phone and it will search for the correct driver.
2. Check include this location ... ... and click on browse. Look for USB VCOM Driver and Click on 2K_XP_COM folder if you are using Windows XP or Win7 for Windows 7 and then press OK when you are done picking the right folder for the driver.
3. If the driver is successfully installed MediaTek DA USB VCOM will appear in the New Hardware Wizard.
Video Installing VCOM Driver (please watch in HD)
Video Flashing your phone (please watch in HD)
"Your Phone must be turned off when you are ready to connect and flash your phone"
Flashing
1. Launch FlashTool
2. Click on Scatter-Loading, and load your scatter file. (see example below with loaded file in Flash Tool
Video Reference Using FlashTool version 5.xxx (watch in HD)
3. After you load the file, press F9 or Press Download to Flash your Phone.
4. If Download is not possible, you can press Firmware Upgrade.
5. After you press Download or Firmware Upgrade re-insert your battery and connect your Phone to the PC. Press Volume Down or Volume Up while connecting to PC.
"Hard reset your phone after flashing"
I hope this tutorial help you. Please drop a comment if something is not clear to you.
Subscribe to:
Posts (Atom)