Showing posts with label flash. Show all posts
Showing posts with label flash. Show all posts
Thursday, February 5, 2015
Flash Sound Tutorial How to Add Sound to Flash Movies Importing Audio Files into a Flash Documents Library
In this beginners Flash sound tutorial, were going to talk about the basics of how to add sound in Flash. Adding sound to your Flash projects can make them a little more interesting. You can use audio files to add voice over narrations, background music and sound effects, for example. One way of being able to work with sound using Flash is by importing the sound files into your Flash document. Some of the audio formats that Flash gives you the ability to import include, but are not limited to:
In the next article, were going to learn how to add imported audio files to a Flash documents timeline. That article is also going to talk about the difference between the Flash Event Sound and the Flash Stream Sound options - two options for synchronizing sound in Flash.
NEXT: Adding Sound to Flash Movie Timeline and Choosing Flash Sync Sound Options - Flash Event Sound vs Flash Stream Sound
Read more »
- MP3
- WAV
- AIFF
NOTE: Working with audio in Flash can take up a lot of resources. You might want to consider working with MP3 files over WAV and AIFF files since MP3 files are compressed and will take up less disk space. Also, if you wont be using the entire audio file, you might want to create a shorter version of the audio file using an audio editing application, and use that shortened version instead. This will help save more disk space.
To be able to add sound to the timeline of your Flash movie, import the audio file into your Flash document first. Heres how:
To be able to add sound to the timeline of your Flash movie, import the audio file into your Flash document first. Heres how:
- From the main menu, choose File > Import > Import to Library

- When the Import to Library dialog box comes up, navigate to the folder that contains the audio file, select the file, and click on Open

- Once Flash finishes importing the file, you should be able to see it in the Flash documents library

In the next article, were going to learn how to add imported audio files to a Flash documents timeline. That article is also going to talk about the difference between the Flash Event Sound and the Flash Stream Sound options - two options for synchronizing sound in Flash.
NEXT: Adding Sound to Flash Movie Timeline and Choosing Flash Sync Sound Options - Flash Event Sound vs Flash Stream Sound

Sunday, February 1, 2015
The New Features of Adobe Flash Professional CS6
The Adobe Creative Suite 6 was released last May 07, 2012, and with it comes Adobe Flash Professional CS6. Here are some of its new features:
If youre a beginner whos just purchased the Adobe Flash Professional CS6 program, check out the Adobe Flash Professional CS6 Essential Training course so that you can get the most out of this amazing program. You can get a free 7-day trial for complete access to this entire 8-hour online video training course by lynda.com.
Read more »
- the ability to create and export sprite sheets from symbols on the Stage and in the library
- a new SWF compression type based on LZMA (Lempel-Ziv-Markov chain algorithm), which can reduce the file size by up to 40%
- ability to export animations from Flash out to HTML5 through the Toolkit for CreateJS extension
- captive AIR runtime support for Android, OS X, and Windows
- the new Content Simulator, an AIR application that helps you simulate how your content will behave on a mobile device
- Flash Professional CS6 projects are now compatible with AIR native extensions for advanced users with the advent of AIR 3.2
- the ability to list additional languages that your application can be installed in
- iOS debugging via wi-fi now lets you add breakpoints, step in and out of functions, and watch variables
If youre a beginner whos just purchased the Adobe Flash Professional CS6 program, check out the Adobe Flash Professional CS6 Essential Training course so that you can get the most out of this amazing program. You can get a free 7-day trial for complete access to this entire 8-hour online video training course by lynda.com.
Saturday, January 31, 2015
Flash 8 Frame by Frame Animation and Flash 8 Onion Skin Feature Video Tutorial Series
NOTE: If you are looking for a version of this tutorial for Flash CS5, then check out Creating a Frame by Frame Animation - Flash CS5 Video Tutorials for Beginners.
In this set of Macromedia Flash tutorial online video training clips, well show you the basics of creating a simple frame by frame animation in Macromedia Flash 8. In these tutorials, youll learn how to insert blank keyframes, draw using the brush tool, and youll also learn how to use the helpful Flash 8 onion skin feature, which is a very useful tool when doing frame by frame animation in Flash 8. Well also be explaining what the FLA and SWF file formats are.
Macromedia Flash 8 lets you easily create your own frame-by-frame animation. In this video, we explain how a frame by frame animation works and we show you a simple example of a Flash 8 stickman animation.
[ALTERNATE LINK]
In part 2 of the Flash Frame-By-Frame Animation Tutorial for beginners series, we show you how to draw a simple stickman on the stage of your Flash document.
[ALTERNATE LINK]
In Part 3 of this Flash 8 video training series, well teach you how to add keyframes and how to use the Flash 8 Onion Skin feature - a feature that lets you see a tracing guide based on the objects in previous or next keyframes.
[ALTERNATE LINK]
Make it a habit to save your work often! It can save you from the frustration of losing all of your hard work.
[ALTERNATE LINK]
In Part 5 of the Flash Frame-By-Frame Animation video tutorial series, well show you how to preview your animation. This video also explains what a SWF file is.
[ALTERNATE LINK]
In the final part of the Flash Frame-By-Frame Animation Tutorial series, well show you how you can adjust the frame rate of your animation.
[ALTERNATE LINK]
Read more »
In this set of Macromedia Flash tutorial online video training clips, well show you the basics of creating a simple frame by frame animation in Macromedia Flash 8. In these tutorials, youll learn how to insert blank keyframes, draw using the brush tool, and youll also learn how to use the helpful Flash 8 onion skin feature, which is a very useful tool when doing frame by frame animation in Flash 8. Well also be explaining what the FLA and SWF file formats are.
Part 1: Flash 8 Frame-By-Frame Animation Tutorial - Introduction
Macromedia Flash 8 lets you easily create your own frame-by-frame animation. In this video, we explain how a frame by frame animation works and we show you a simple example of a Flash 8 stickman animation.
[ALTERNATE LINK]
Part 2: Flash 8 Frame-By-Frame Animation Tutorial - Drawing on the Stage
In part 2 of the Flash Frame-By-Frame Animation Tutorial for beginners series, we show you how to draw a simple stickman on the stage of your Flash document.
[ALTERNATE LINK]
Part 3: Flash 8 Frame-By-Frame Animation Tutorial - Adding Keyframes and the Onion Skin Feature
In Part 3 of this Flash 8 video training series, well teach you how to add keyframes and how to use the Flash 8 Onion Skin feature - a feature that lets you see a tracing guide based on the objects in previous or next keyframes.
[ALTERNATE LINK]
Part 4: Flash 8 Frame-By-Frame Animation Tutorial - Saving Your Document
Make it a habit to save your work often! It can save you from the frustration of losing all of your hard work.
[ALTERNATE LINK]
Part 5: Flash 8 Frame-By-Frame Animation Tutorial - Previewing Your Animation
In Part 5 of the Flash Frame-By-Frame Animation video tutorial series, well show you how to preview your animation. This video also explains what a SWF file is.
[ALTERNATE LINK]
Part 6: Flash 8 Frame-By-Frame Animation Tutorial - Adjusting the Frame Rate
In the final part of the Flash Frame-By-Frame Animation Tutorial series, well show you how you can adjust the frame rate of your animation.
[ALTERNATE LINK]
Friday, January 30, 2015
How to Create a Quiz in Flash ActionScript 3 Tutorial PART 1
Exercise File
Start_Quiz_App.fla
In this tutorial, we are going to learn how to create a quiz in Flash using ActionScript 3. Were going to make use of arrays and for loops in order to complete this project.
This tutorial comes with an exercise file (the download link can be found at the top of the article). Lets go ahead and open it and take a look at its contents. This Flash movie has 2 frames. The first frame contains the elements needed for the user to take the quiz. The second frame contains elements that will display the results (answers and scores). The Flash movie should start at frame 1, and stay there until the user finishes answering all the questions. Once the user is done, the Flash movie goes to frame 2 where the answers are checked and the score is given. Since the quiz and the results are separated into two different frames, then the code will be separated as well. Frame 1 will contain the code that is needed to run the quiz (displaying questions and storing the answers submitted by the user), while frame 2 will contain the code that is needed to check the answers, compute the results and display them.
So first, lets go ahead and work on frame 1. Frame 1 contains 3 objects:
The first thing well do is to stop the Flash movie on frame 1. If we dont, then the movie will just continue looping between frames 1 and 2. So select frame 1 of the actions layer, then go to the Actions Panel and put in a stop action.
Next, lets create a couple of objects:
nQNumber
We will be storing the quiz questions in an array. Each question will therefore be numbered starting at 0. This nQNumber variable will be used to move through each of those quiz questions. After the user answers one question, we will have this number increase by one and use that number to retrieve the next question.
aQuestions
This is the array that will be used to store the questions.
aCorrectAnswers
This is the array that stores all the correct answers. Of course we will have to be the ones to provide what the correct answers are, which is why this array is already populated with values. When the array was created, the values were also declared in the array constructor, therefore populating the array. The first value will have an index of 0, the second value will have an index of 1, and so on... You will notice that the aQuestions array, which is supposed to store the questions, has not been given any values yet. Dont worry, well provide those values shortly using array access notation instead.
aUserAnswers
This array will be used to store the answers given by the user. Each time the user (the quiz taker) submits an answer, then that answer will go into this array. So we just create this array first, but we dont put any values in it initially. Well have to wait for what the user will input in the answer field and use those to populate this array instead.
Next, lets go ahead and create the questions. Weve provided 4 answers when the aCorrectAnswers array was created, so well need to provide 4 questions as well. Make sure that the order of the questions corresponds to the order of the answers as well (question index 0 should match answer index 0, question index 1 should match answer index 1, and so on...). We will populate the aQuestions array using Array Access Notation:
So now that weve created all the needed objects and have added all the questions and answers for this first part of our project, lets now go ahead and create the actual quiz functionality.
The first thing well do is display the first question in the questions_txt TextField. So what we can do is get aQuestions[0] (the 0 index corresponds to the first item in the array, and therefore the first question) and assign it to the text property of our TextField like so: questions_txt.text = aQuestions[0] . But the problem here is that wed like to be able to update to the next question after the user finishes answering the first one. So instead of manually inputting the index number, we can make use of a variable instead. And then we can just update that variable whenever needed. This is where our nQNumber variable comes in. Initially, it has a value of 0, so typing in questions_txt.text = aQuestions[nQNumber] will be the the same as typing in questions_txt.text = aQuestions[0] . And then later on, well add some code that will increment the value of nQNumber every time the user submits an answer, thereby updating to the next question. But first, update your code so that the first question will be displayed in the questions_txt TextField:
And now that we have that, the next thing we need to fix is how our Flash movie is going to respond whenever a quiz taker types an answer in the input field and clicks on the submit button. So lets break it down. When the user clicks on the submit button, our flash movie should:
Since we want all this to happen whenever the user clicks on the button, well have to create a CLICK event handler for submit_btn. And lets give the event listener function the name quiz.
Why will there be a problem? There are 4 questions, so naturally, the user will end up clicking the submit button for a total of 4 times.
Yes that is true. But the 4th time the user clicks on the button, nQNumber will be increased to 4. And recall that our array index numbers start at 0, not at 1. So the last question is actually at aQuestions[3]. And aQuestions[4] is actually for a fifth question. But there is no fifth question, and trying to retrieve one from the array will cause an error.
So what do we do then?
Well need to put an if statement that will tell our Flash movie to no longer try to retrieve any more questions, once we get to the last one.
So lets do that now. We need to get the line questions_txt.text = aQuestions[nQNumber]; and place it in an if statement. The if statement needs to check if nQNumber is less than 4. If nQNumber is still less than 4, then go ahead and retrieve the next question. If it is no longer less than 4, then we dont want our code to retrieve any more questions. So we can type in if(nQNumber < 4) as our condition. But... thats actually not what well do. Instead of typing in 4, well use aQuestions.length instead. The length property of the array class tells us how many items there are in the array. So if an array has 5 items, then the array length will be 5. If it has 6 items, then the length will be 6. In this particular example, our array has 4 items, and therefore has an array length of 4.
Why cant I just type in 4? Is there a benefit to using the length property instead?
Well, no one is stopping you from hard-coding in a value of 4, but the great thing about making use of the length property instead is that if you decide to add more questions (or maybe remove some questions), then you wont have to go back to the if statement and hard-code in a new value. The length property will automatically update itself once you add or reduce items in the array. This will be especially useful if you had numerous items in your code that need to reference how long your array is. Imagine if you hard-coded the data numerous times in different parts of your code. Then every time you decide to add or subtract items to the array, then youll have to go back to all those hard-coded parts of your code, and manually change the value. That would not be very efficient.
So our updated event listener function will now look like this:
Great! So once the user gets through all the questions, what do we do next?
We then tell the Flash movie to go to the next frame where the user will get the quiz results. To do that, we just add an else clause to our if statement that will instruct our Flash movie to go the the next frame. We will use the nextFrame() method of the MovieClip class to move the playhead to the next frame. So basically, what were telling our Flash movie is that if nQNumber is no longer less than aQuestions.length, then it means that we dont have anymore questions and the quiz is done, and it can now move to frame 2 where the results will be displayed. So finally, our updated event listener function will look like this:
In the next part of this tutorial, we will work on the code that will display the answers that the user submitted alongside the correct answers. We will also work on the code that will check the answers and calculate and display the users score.
Heres the frame 1 code in full:
NEXT: How to Create a Quiz in Flash - ActionScript 3 Tutorial - PART 2
Read more »
Start_Quiz_App.fla
In this tutorial, we are going to learn how to create a quiz in Flash using ActionScript 3. Were going to make use of arrays and for loops in order to complete this project.
This tutorial comes with an exercise file (the download link can be found at the top of the article). Lets go ahead and open it and take a look at its contents. This Flash movie has 2 frames. The first frame contains the elements needed for the user to take the quiz. The second frame contains elements that will display the results (answers and scores). The Flash movie should start at frame 1, and stay there until the user finishes answering all the questions. Once the user is done, the Flash movie goes to frame 2 where the answers are checked and the score is given. Since the quiz and the results are separated into two different frames, then the code will be separated as well. Frame 1 will contain the code that is needed to run the quiz (displaying questions and storing the answers submitted by the user), while frame 2 will contain the code that is needed to check the answers, compute the results and display them.
So first, lets go ahead and work on frame 1. Frame 1 contains 3 objects:
- questions_txt - This is a Dynamic TextField that will be used to display the questions. In the Properties Inspector, this TextField has been set to be multilined.
- answers_txt - This is an Input TextField where the user will type in the answer. In the Properties Inspector, this TextField has been set to have a border and to be a single line TextField.
- submit_btn - This button will be used by the user to submit each answer.
The first thing well do is to stop the Flash movie on frame 1. If we dont, then the movie will just continue looping between frames 1 and 2. So select frame 1 of the actions layer, then go to the Actions Panel and put in a stop action.
stop();
Next, lets create a couple of objects:
stop();What are these instances for?
var nQNumber:Number = 0;
var aQuestions:Array = new Array();
var aCorrectAnswers:Array = new Array("Jupiter", "Mars", "war", "Titan");
var aUserAnswers:Array = new Array();
nQNumber
We will be storing the quiz questions in an array. Each question will therefore be numbered starting at 0. This nQNumber variable will be used to move through each of those quiz questions. After the user answers one question, we will have this number increase by one and use that number to retrieve the next question.
aQuestions
This is the array that will be used to store the questions.
aCorrectAnswers
This is the array that stores all the correct answers. Of course we will have to be the ones to provide what the correct answers are, which is why this array is already populated with values. When the array was created, the values were also declared in the array constructor, therefore populating the array. The first value will have an index of 0, the second value will have an index of 1, and so on... You will notice that the aQuestions array, which is supposed to store the questions, has not been given any values yet. Dont worry, well provide those values shortly using array access notation instead.
aUserAnswers
This array will be used to store the answers given by the user. Each time the user (the quiz taker) submits an answer, then that answer will go into this array. So we just create this array first, but we dont put any values in it initially. Well have to wait for what the user will input in the answer field and use those to populate this array instead.
Next, lets go ahead and create the questions. Weve provided 4 answers when the aCorrectAnswers array was created, so well need to provide 4 questions as well. Make sure that the order of the questions corresponds to the order of the answers as well (question index 0 should match answer index 0, question index 1 should match answer index 1, and so on...). We will populate the aQuestions array using Array Access Notation:
var nQNumber:Number = 0;
var aQuestions:Array = new Array();
var aCorrectAnswers:Array = new Array("Jupiter", "Mars", "war", "Titan");
var aUserAnswers:Array = new Array();
aQuestions[0] = "What is the biggest planet in our solar system?";
aQuestions[1] = "Which planet in our solar system is the 4th planet from the sun?";
aQuestions[2] = "Mars is named after the Roman god of ___.";
aQuestions[3] = "What is the name of Saturns largest moon?";
So now that weve created all the needed objects and have added all the questions and answers for this first part of our project, lets now go ahead and create the actual quiz functionality.
The first thing well do is display the first question in the questions_txt TextField. So what we can do is get aQuestions[0] (the 0 index corresponds to the first item in the array, and therefore the first question) and assign it to the text property of our TextField like so: questions_txt.text = aQuestions[0] . But the problem here is that wed like to be able to update to the next question after the user finishes answering the first one. So instead of manually inputting the index number, we can make use of a variable instead. And then we can just update that variable whenever needed. This is where our nQNumber variable comes in. Initially, it has a value of 0, so typing in questions_txt.text = aQuestions[nQNumber] will be the the same as typing in questions_txt.text = aQuestions[0] . And then later on, well add some code that will increment the value of nQNumber every time the user submits an answer, thereby updating to the next question. But first, update your code so that the first question will be displayed in the questions_txt TextField:
aQuestions[0] = "What is the biggest planet in our solar system?";So now, if you test the movie, you should see the first question displayed in the TextField.
aQuestions[1] = "Which planet in our solar system is the 4th planet from the sun?";
aQuestions[2] = "Mars is named after the Roman god of ___.";
aQuestions[3] = "What is the name of Saturns largest moon?";
questions_txt.text = aQuestions[nQNumber];
And now that we have that, the next thing we need to fix is how our Flash movie is going to respond whenever a quiz taker types an answer in the input field and clicks on the submit button. So lets break it down. When the user clicks on the submit button, our flash movie should:
- get the users answer (what he or she inputs in the answer field) and add it to the aUserAnswers array
- update to the next question
Since we want all this to happen whenever the user clicks on the button, well have to create a CLICK event handler for submit_btn. And lets give the event listener function the name quiz.
questions_txt.text = aQuestions[nQNumber];
submit_btn.addEventListener(MouseEvent.CLICK, quiz);
function quiz(e:MouseEvent):void
{
// This function will be responsible for:
// 1. pushing the users answers to the aCorrectAnswers array
// 2. updating to the next question
}function quiz(e:MouseEvent):void
{
aUserAnswers.push(answers_txt.text);
answers_txt.text = ""; // This line puts an empty string, making the TextField appear empty again
}function quiz(e:MouseEvent):void
{
aUserAnswers.push(answers_txt.text);
answers_txt.text = "";
nQNumber++;
questions_txt.text = aQuestions[nQNumber];
}Why will there be a problem? There are 4 questions, so naturally, the user will end up clicking the submit button for a total of 4 times.
Yes that is true. But the 4th time the user clicks on the button, nQNumber will be increased to 4. And recall that our array index numbers start at 0, not at 1. So the last question is actually at aQuestions[3]. And aQuestions[4] is actually for a fifth question. But there is no fifth question, and trying to retrieve one from the array will cause an error.
So what do we do then?
Well need to put an if statement that will tell our Flash movie to no longer try to retrieve any more questions, once we get to the last one.
So lets do that now. We need to get the line questions_txt.text = aQuestions[nQNumber]; and place it in an if statement. The if statement needs to check if nQNumber is less than 4. If nQNumber is still less than 4, then go ahead and retrieve the next question. If it is no longer less than 4, then we dont want our code to retrieve any more questions. So we can type in if(nQNumber < 4) as our condition. But... thats actually not what well do. Instead of typing in 4, well use aQuestions.length instead. The length property of the array class tells us how many items there are in the array. So if an array has 5 items, then the array length will be 5. If it has 6 items, then the length will be 6. In this particular example, our array has 4 items, and therefore has an array length of 4.
Why cant I just type in 4? Is there a benefit to using the length property instead?
Well, no one is stopping you from hard-coding in a value of 4, but the great thing about making use of the length property instead is that if you decide to add more questions (or maybe remove some questions), then you wont have to go back to the if statement and hard-code in a new value. The length property will automatically update itself once you add or reduce items in the array. This will be especially useful if you had numerous items in your code that need to reference how long your array is. Imagine if you hard-coded the data numerous times in different parts of your code. Then every time you decide to add or subtract items to the array, then youll have to go back to all those hard-coded parts of your code, and manually change the value. That would not be very efficient.
So our updated event listener function will now look like this:
function quiz(e:MouseEvent):void
{
aUserAnswers.push(answers_txt.text);
answers_txt.text = "";
nQNumber++;
if(nQNumber < aQuestions.length)
{
questions_txt.text = aQuestions[nQNumber];
}
}Great! So once the user gets through all the questions, what do we do next?
We then tell the Flash movie to go to the next frame where the user will get the quiz results. To do that, we just add an else clause to our if statement that will instruct our Flash movie to go the the next frame. We will use the nextFrame() method of the MovieClip class to move the playhead to the next frame. So basically, what were telling our Flash movie is that if nQNumber is no longer less than aQuestions.length, then it means that we dont have anymore questions and the quiz is done, and it can now move to frame 2 where the results will be displayed. So finally, our updated event listener function will look like this:
function quiz(e:MouseEvent):void
{
aUserAnswers.push(answers_txt.text);
answers_txt.text = "";
nQNumber++;
if(nQNumber < aQuestions.length)
{
questions_txt.text = aQuestions[nQNumber];
}
else
{
nextFrame();
}
}In the next part of this tutorial, we will work on the code that will display the answers that the user submitted alongside the correct answers. We will also work on the code that will check the answers and calculate and display the users score.
Heres the frame 1 code in full:
stop();

var nQNumber:Number = 0;
var aQuestions:Array = new Array();
var aCorrectAnswers:Array = new Array("Jupiter", "Mars", "war", "Titan");
var aUserAnswers:Array = new Array();
aQuestions[0] = "What is the biggest planet in our solar system?";
aQuestions[1] = "Which planet in our solar system is the 4th planet from the sun?";
aQuestions[2] = "Mars is named after the Roman god of ___.";
aQuestions[3] = "What is the name of Saturns largest moon?";

questions_txt.text = aQuestions[nQNumber];
submit_btn.addEventListener(MouseEvent.CLICK, quiz);
function quiz(e:MouseEvent):void
{
     aUserAnswers.push(answers_txt.text);
     answers_txt.text = "";
     nQNumber++;
     if(nQNumber < aQuestions.length)
     {
          questions_txt.text = aQuestions[nQNumber];
     }
     else
     {
          nextFrame();
     }
}NEXT: How to Create a Quiz in Flash - ActionScript 3 Tutorial - PART 2
Thursday, January 29, 2015
Developing iPhone Games Using Flash CS5 iPhone Game Development Course
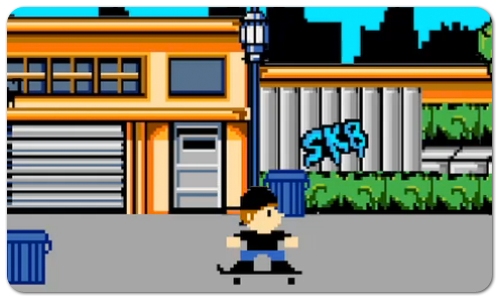
Interested in developing iPhone games using Flash CS5? Then check out this iPhone game development course from lynda.com. The course is entitled Flash Professional CS5: Creating a Simple Game for iOS Devices, and you will find some sample videos below. The course covers the game development from start to finish, including planning and preparation, character and background animation, creating interactions and scoring mechanism, and finally testing and publishing the app. If you like the free video tutorials below and would like to view the entire course, then you can sign up for a lynda.com membership or get a free 7-day trial.
 or
or 
or
or
Read more »
Flash Professional CS5: Creating a Simple Game for iOS Devices by 
START LEARNING TODAY!
or WATCH THESE FREE VIDEOS FROM THE COURSE
Flash Professional CS5: Creating a Simple Game for iOS Devices - Welcome
Reviewing the finished game - Developing iPhone Games using Flash CS5 | iPhone Game Development Course
Making the character move - Developing iPhone Games using Flash CS5 | iPhone Game Development Course
Reviewing the finished game - Developing iPhone Games using Flash CS5 | iPhone Game Development Course
Making the character move - Developing iPhone Games using Flash CS5 | iPhone Game Development Course
START LEARNING TODAY!
or Course Information
Training Provider: Lynda.com
Title: Flash Professional CS5: Creating a Simple Game for iOS Devices
Author: Todd Perkins
Duration: 2hrs 8mins
Date of release: 25 Feb 2011
Chapter 1: Planning and Preparing the Game
Reviewing the finished game
Optimizing assets
Planning gameplay and viewing class structure
Viewing the FLA file
Chapter 2: Controlling Character Movement
Making the character move
Adding accelerometer support
Making the character jump
Simulating a finger swipe
Adding sound effects
Chapter 3: Creating Animated Background Elements
Creating a reusable Mover class
Linking the Mover class to the parallax elements
Looping background animations
Chapter 4: Adding Obstacles and Scoring
Creating a reusable Obstacle class
Detecting collisions with the player
Ending the game when the player bails
Using a timer to create trash cans
Calculating points and deleting unused objects
Using a shared object to save a high score
Increasing scrolling speed as gameplay progresses
Chapter 5: Testing, Debugging, and Publishing Your Game
Acquiring testing certificates and provisioning profiles
Troubleshooting performance issues
Finalizing code, adding an icon graphic, and setting a loading graphic
Publishing the final version of the app
Testing on your iOS device
Submitting the app to Apple for release in the App Store
Training Provider: Lynda.com
Title: Flash Professional CS5: Creating a Simple Game for iOS Devices
Author: Todd Perkins
Duration: 2hrs 8mins
Date of release: 25 Feb 2011
Chapter 1: Planning and Preparing the Game
Reviewing the finished game
Optimizing assets
Planning gameplay and viewing class structure
Viewing the FLA file
Chapter 2: Controlling Character Movement
Making the character move
Adding accelerometer support
Making the character jump
Simulating a finger swipe
Adding sound effects
Chapter 3: Creating Animated Background Elements
Creating a reusable Mover class
Linking the Mover class to the parallax elements
Looping background animations
Chapter 4: Adding Obstacles and Scoring
Creating a reusable Obstacle class
Detecting collisions with the player
Ending the game when the player bails
Using a timer to create trash cans
Calculating points and deleting unused objects
Using a shared object to save a high score
Increasing scrolling speed as gameplay progresses
Chapter 5: Testing, Debugging, and Publishing Your Game
Acquiring testing certificates and provisioning profiles
Troubleshooting performance issues
Finalizing code, adding an icon graphic, and setting a loading graphic
Publishing the final version of the app
Testing on your iOS device
Submitting the app to Apple for release in the App Store
About Lynda.com
Lynda.com is an online video training provider with over 1000 courses covering a wide array of topics - 3D, video, business, the web, graphic design, programming, animation, photography, and more. They produce top quality video tutorials with the best industry experts as your instructors. With a subscription, you can log-in at any time, and learn at your own pace. New courses are added each week, and you will receive a certificate of completion for each course that you finish.
Start learning today!
If you enjoyed the sample videos above and want to access the entire Flash Professional CS5: Creating a Simple Game for iOS Devices course, you can sign up for a lynda.com membership. Your membership will allow you to access not only this course, but also the entire lynda.com library for as low as $25 for 1-month. Their training library has over 1000 courses with 50,000+ video tutorials. No long-term commitment required. You can cancel your membership at any time.
Not yet convinced? Try a FREE 7-day trial.
As a special promotion, visitors of this site can get a FREE 7-day trial to lynda.com. This free trial gives you access to their entire training library of over 1000 courses.
Cant wait to start developing iPhone games using Flash CS5? Then become a lynda.com member today to watch this entire Flash CS5 iPhone game development course. Your membership also gives you access to the entire lynda.com library of over 1000 courses.Lynda.com is an online video training provider with over 1000 courses covering a wide array of topics - 3D, video, business, the web, graphic design, programming, animation, photography, and more. They produce top quality video tutorials with the best industry experts as your instructors. With a subscription, you can log-in at any time, and learn at your own pace. New courses are added each week, and you will receive a certificate of completion for each course that you finish.
Start learning today!
If you enjoyed the sample videos above and want to access the entire Flash Professional CS5: Creating a Simple Game for iOS Devices course, you can sign up for a lynda.com membership. Your membership will allow you to access not only this course, but also the entire lynda.com library for as low as $25 for 1-month. Their training library has over 1000 courses with 50,000+ video tutorials. No long-term commitment required. You can cancel your membership at any time.
Not yet convinced? Try a FREE 7-day trial.
As a special promotion, visitors of this site can get a FREE 7-day trial to lynda.com. This free trial gives you access to their entire training library of over 1000 courses.
START LEARNING TODAY!
or MyPhone Fuego Ignite Flash File Firmware
Before you proceed flashing / hard resetting your phone / tablet make sure to back up your important files if possible. Because we care about your data.
You can use this flash file in GPG Dragon, Volcano Box, Miracle Box and other box that support .bin format. This phone uses MTK 6260 chipset.

You can download the file below.
Download Here
Read more »
We also suggest that your battery should be atleast 50% or better to have it fully charge, lower than the said value may cause unwanted result, such as bricking your phone / tablet rendering it unuseable. This is very important in flashing your phone / tablet. Use original USB cable as possible.
Files that you downloaded should not be corrupted, if ever the file is corrupted you might brick your phone. Or the flashing will start.
Drivers are very important specially in Spreadtrum Chipset, having an Spreadtrum SPD6610 (non android devices) driver will not work in SPD6820 (android devices).
If you are using laptop to flash your phone, make your that it has enough charge. If your laptop shutdown when your flashing your phone/tablet, youll end up bricking your phone. Sometimes you can still recover your phone just flash it again and your phone will boot up again. But that is just a case to case basis, if your phone / tablet is deadboot (totally dead, erased all program in the chip) you cant recover it, you will need to seek professional help (technician).
You can use this flash file in GPG Dragon, Volcano Box, Miracle Box and other box that support .bin format. This phone uses MTK 6260 chipset.
You can download the file below.
Download Here
Understanding the difference between Object Drawing Mode vs Merge Drawing Mode in Flash PART 1 Flash CS5 Beginners Tutorial
- Part 1
- Part 2
- Part 3
- Part 4
- Part 5
When you use the drawing tools in Flash, you have the option to draw in two modes: object drawing mode vs merge drawing mode. This article will explain a few of the differences between the two.
Step 1
Create a new Flash document.
Step 2
Select the brush tool. You can use any brush size, color and shape that youd like. But I recommend that you choose a brush size thats not too small so that what you draw will be thicker and more visible. Also, make sure that the color you choose is different from the background color of your document.
Step 3
Once the brush tool is selected, take a look at the toolbar and look for the icon that shows a circle inside a square.

You can click on this button, and it allows you to activate or deactivate the object drawing mode. If the icon appears to look inset, it means that the object drawing mode is ON. If not, then it means that the object drawing mode is OFF, and you are therefore on merge drawing mode instead.

Clicking on this button lets you switch between object mode and merge mode. Check the object drawing mode button in your toolbar to see whether its ON or OFF. If its ON, then click on it to turn it OFF. If not, then leave it as is.
Step 4
The best way to explain the differences between the two drawing modes is to create examples. So make sure that the object drawing mode is OFF. Then draw a line on the left side of the stage using the brush tool.

Now remember, since the object drawing mode is OFF, this means that this line was drawn in merge mode.
Step 5
Now lets switch to the object drawing mode. So this time, make sure that the object drawing mode is ON. And then draw another line on the right side of the stage using the brush tool.

Immediately, youll notice a difference. Youll see that this new line that you drew while you were in the object drawing mode is enclosed in a box. When its enclosed in this box, it means that the artwork is currently selected. And when its selected, this means that you can edit it (e.g. move it, change the color, modify the size). However, when you select something that was drawn in merge mode, it will NOT show a box or a border around it. In the next step, well see what happens instead.
Step 6
Now lets select the other line to see how artwork drawn in merge mode will look like when its selected.
In the toolbar, choose the selection tool (its the black arrow).

Then click on the line that you drew on the left side of the stage in order to select it.

Here, youll see that the selection looks different (click on the image above to enlarge). Instead of being enclosed in a box, youll see dots all over the artwork. So when you see this, this means that you currently have a merge type of drawing selected.
So here we see that object drawings and merge drawings look different from each other when they are selected. This easily lets us know whether something is an object drawing or a merge drawing.
But aside from this, what other differences do they have?
Another difference between a merge drawing and an object drawing is this:
Merge drawing - you have the ability to directly select just a portion of the drawing
Object drawing - if you try to select even just a small portion of the object drawing, the entire object drawing automatically gets selected
To better understand this, lets practice it using our examples on the stage.
Step 7
Make sure youre still using the selection tool. Lets first try to select a portion of the merge drawing on the left side of the stage. To select a portion, use the selection tool, then just click and drag a selection area that covers a small part of the artwork. Refer to the image below as a guide:

Once you release the mouse and youve selected the portion, youll see the dots appear only on top of the part that was selected. So this means that the parts that are not covered with dots are not included in the selection.
Step 8
Now lets edit the currently selected portion.
Go to the toolbar, and select a new color for the selected portion by picking one from the fill color box.

Just click on the color box and select a different color. Youll then see that the new color only applies to the selected portion.

So with merge drawings, you see that we can easily select just a portion of it. The selected portion can then be edited without affecting the rest of the drawing. You can change the selected portions color, modify its shape, move it to a different location, or you can even delete it if youd like.
In the next step, well see if we can do the same thing with the object drawing on the right.
Step 9
So now, while still using the selection tool, well try to select just a portion of the drawing on the right.
Go ahead and click and drag a selection area that just covers a portion of the shape, similar to what we did in step 7.

Once you release the mouse, youll see that even though you selected only a portion of the drawing, the entire shape still gets selected. That is what happens with object drawings. As long as you select even the tiniest portion of the drawing, the entire thing gets selected.
But what can you do if youve got an object drawing, but youd still like to be able to select only a portion of it? The next step will show you how.
Step 10
With object drawings, its still possible to select just a portion of the shape. Theres just an extra step that you have to do.
First, take note of the edit bar, which can be found above the stage. It should say Scene 1.

The edit bar tells you where you are. Right now, you are on scene 1.
Now go ahead and double-click on the object drawing on the right side of the stage.
After you double-click on it, look at the edit bar again. It should now say Scene 1 followed by Drawing Object.

What this means is that you are now inside the drawing object. You should see that you no longer have the box around your drawing. So in a way, its as if you opened the box to get direct access to the artwork inside it. And now that youre inside the box, youll be able to treat the artwork as a merge drawing. So youll now have the ability to select just portions of it instead of the entire shape.
Step 11
Once youre finished editing an object drawing, its important that you go back to the main scene. Otherwise, you might end up inadvertently adding unwanted elements to the object drawing that youre currently editing.
To go back to scene 1, just click on the Scene 1 link in the edit bar.

NOTE: Always be mindful of the edit bar. Its a common mistake for many to accidentally double-click on an object drawing, and then they fail to notice that they are no longer in the main scene, but continue to work as if they are.
In part 2 of this series, well create some object and merge drawing examples using the oval tool.
Understanding the difference between Object Drawing Mode vs Merge Drawing Mode in Flash - PART 2: NEXT >>
Subscribe to:
Posts (Atom)