Showing posts with label cs5. Show all posts
Showing posts with label cs5. Show all posts
Thursday, January 29, 2015
Developing iPhone Games Using Flash CS5 iPhone Game Development Course
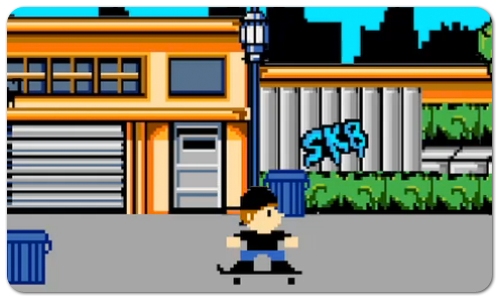
Interested in developing iPhone games using Flash CS5? Then check out this iPhone game development course from lynda.com. The course is entitled Flash Professional CS5: Creating a Simple Game for iOS Devices, and you will find some sample videos below. The course covers the game development from start to finish, including planning and preparation, character and background animation, creating interactions and scoring mechanism, and finally testing and publishing the app. If you like the free video tutorials below and would like to view the entire course, then you can sign up for a lynda.com membership or get a free 7-day trial.
 or
or 
or
or
Read more »
Flash Professional CS5: Creating a Simple Game for iOS Devices by 
START LEARNING TODAY!
or WATCH THESE FREE VIDEOS FROM THE COURSE
Flash Professional CS5: Creating a Simple Game for iOS Devices - Welcome
Reviewing the finished game - Developing iPhone Games using Flash CS5 | iPhone Game Development Course
Making the character move - Developing iPhone Games using Flash CS5 | iPhone Game Development Course
Reviewing the finished game - Developing iPhone Games using Flash CS5 | iPhone Game Development Course
Making the character move - Developing iPhone Games using Flash CS5 | iPhone Game Development Course
START LEARNING TODAY!
or Course Information
Training Provider: Lynda.com
Title: Flash Professional CS5: Creating a Simple Game for iOS Devices
Author: Todd Perkins
Duration: 2hrs 8mins
Date of release: 25 Feb 2011
Chapter 1: Planning and Preparing the Game
Reviewing the finished game
Optimizing assets
Planning gameplay and viewing class structure
Viewing the FLA file
Chapter 2: Controlling Character Movement
Making the character move
Adding accelerometer support
Making the character jump
Simulating a finger swipe
Adding sound effects
Chapter 3: Creating Animated Background Elements
Creating a reusable Mover class
Linking the Mover class to the parallax elements
Looping background animations
Chapter 4: Adding Obstacles and Scoring
Creating a reusable Obstacle class
Detecting collisions with the player
Ending the game when the player bails
Using a timer to create trash cans
Calculating points and deleting unused objects
Using a shared object to save a high score
Increasing scrolling speed as gameplay progresses
Chapter 5: Testing, Debugging, and Publishing Your Game
Acquiring testing certificates and provisioning profiles
Troubleshooting performance issues
Finalizing code, adding an icon graphic, and setting a loading graphic
Publishing the final version of the app
Testing on your iOS device
Submitting the app to Apple for release in the App Store
Training Provider: Lynda.com
Title: Flash Professional CS5: Creating a Simple Game for iOS Devices
Author: Todd Perkins
Duration: 2hrs 8mins
Date of release: 25 Feb 2011
Chapter 1: Planning and Preparing the Game
Reviewing the finished game
Optimizing assets
Planning gameplay and viewing class structure
Viewing the FLA file
Chapter 2: Controlling Character Movement
Making the character move
Adding accelerometer support
Making the character jump
Simulating a finger swipe
Adding sound effects
Chapter 3: Creating Animated Background Elements
Creating a reusable Mover class
Linking the Mover class to the parallax elements
Looping background animations
Chapter 4: Adding Obstacles and Scoring
Creating a reusable Obstacle class
Detecting collisions with the player
Ending the game when the player bails
Using a timer to create trash cans
Calculating points and deleting unused objects
Using a shared object to save a high score
Increasing scrolling speed as gameplay progresses
Chapter 5: Testing, Debugging, and Publishing Your Game
Acquiring testing certificates and provisioning profiles
Troubleshooting performance issues
Finalizing code, adding an icon graphic, and setting a loading graphic
Publishing the final version of the app
Testing on your iOS device
Submitting the app to Apple for release in the App Store
About Lynda.com
Lynda.com is an online video training provider with over 1000 courses covering a wide array of topics - 3D, video, business, the web, graphic design, programming, animation, photography, and more. They produce top quality video tutorials with the best industry experts as your instructors. With a subscription, you can log-in at any time, and learn at your own pace. New courses are added each week, and you will receive a certificate of completion for each course that you finish.
Start learning today!
If you enjoyed the sample videos above and want to access the entire Flash Professional CS5: Creating a Simple Game for iOS Devices course, you can sign up for a lynda.com membership. Your membership will allow you to access not only this course, but also the entire lynda.com library for as low as $25 for 1-month. Their training library has over 1000 courses with 50,000+ video tutorials. No long-term commitment required. You can cancel your membership at any time.
Not yet convinced? Try a FREE 7-day trial.
As a special promotion, visitors of this site can get a FREE 7-day trial to lynda.com. This free trial gives you access to their entire training library of over 1000 courses.
Cant wait to start developing iPhone games using Flash CS5? Then become a lynda.com member today to watch this entire Flash CS5 iPhone game development course. Your membership also gives you access to the entire lynda.com library of over 1000 courses.Lynda.com is an online video training provider with over 1000 courses covering a wide array of topics - 3D, video, business, the web, graphic design, programming, animation, photography, and more. They produce top quality video tutorials with the best industry experts as your instructors. With a subscription, you can log-in at any time, and learn at your own pace. New courses are added each week, and you will receive a certificate of completion for each course that you finish.
Start learning today!
If you enjoyed the sample videos above and want to access the entire Flash Professional CS5: Creating a Simple Game for iOS Devices course, you can sign up for a lynda.com membership. Your membership will allow you to access not only this course, but also the entire lynda.com library for as low as $25 for 1-month. Their training library has over 1000 courses with 50,000+ video tutorials. No long-term commitment required. You can cancel your membership at any time.
Not yet convinced? Try a FREE 7-day trial.
As a special promotion, visitors of this site can get a FREE 7-day trial to lynda.com. This free trial gives you access to their entire training library of over 1000 courses.
START LEARNING TODAY!
or 
Understanding the difference between Object Drawing Mode vs Merge Drawing Mode in Flash PART 1 Flash CS5 Beginners Tutorial
- Part 1
- Part 2
- Part 3
- Part 4
- Part 5
When you use the drawing tools in Flash, you have the option to draw in two modes: object drawing mode vs merge drawing mode. This article will explain a few of the differences between the two.
Step 1
Create a new Flash document.
Step 2
Select the brush tool. You can use any brush size, color and shape that youd like. But I recommend that you choose a brush size thats not too small so that what you draw will be thicker and more visible. Also, make sure that the color you choose is different from the background color of your document.
Step 3
Once the brush tool is selected, take a look at the toolbar and look for the icon that shows a circle inside a square.

You can click on this button, and it allows you to activate or deactivate the object drawing mode. If the icon appears to look inset, it means that the object drawing mode is ON. If not, then it means that the object drawing mode is OFF, and you are therefore on merge drawing mode instead.

Clicking on this button lets you switch between object mode and merge mode. Check the object drawing mode button in your toolbar to see whether its ON or OFF. If its ON, then click on it to turn it OFF. If not, then leave it as is.
Step 4
The best way to explain the differences between the two drawing modes is to create examples. So make sure that the object drawing mode is OFF. Then draw a line on the left side of the stage using the brush tool.

Now remember, since the object drawing mode is OFF, this means that this line was drawn in merge mode.
Step 5
Now lets switch to the object drawing mode. So this time, make sure that the object drawing mode is ON. And then draw another line on the right side of the stage using the brush tool.

Immediately, youll notice a difference. Youll see that this new line that you drew while you were in the object drawing mode is enclosed in a box. When its enclosed in this box, it means that the artwork is currently selected. And when its selected, this means that you can edit it (e.g. move it, change the color, modify the size). However, when you select something that was drawn in merge mode, it will NOT show a box or a border around it. In the next step, well see what happens instead.
Step 6
Now lets select the other line to see how artwork drawn in merge mode will look like when its selected.
In the toolbar, choose the selection tool (its the black arrow).

Then click on the line that you drew on the left side of the stage in order to select it.

Here, youll see that the selection looks different (click on the image above to enlarge). Instead of being enclosed in a box, youll see dots all over the artwork. So when you see this, this means that you currently have a merge type of drawing selected.
So here we see that object drawings and merge drawings look different from each other when they are selected. This easily lets us know whether something is an object drawing or a merge drawing.
But aside from this, what other differences do they have?
Another difference between a merge drawing and an object drawing is this:
Merge drawing - you have the ability to directly select just a portion of the drawing
Object drawing - if you try to select even just a small portion of the object drawing, the entire object drawing automatically gets selected
To better understand this, lets practice it using our examples on the stage.
Step 7
Make sure youre still using the selection tool. Lets first try to select a portion of the merge drawing on the left side of the stage. To select a portion, use the selection tool, then just click and drag a selection area that covers a small part of the artwork. Refer to the image below as a guide:

Once you release the mouse and youve selected the portion, youll see the dots appear only on top of the part that was selected. So this means that the parts that are not covered with dots are not included in the selection.
Step 8
Now lets edit the currently selected portion.
Go to the toolbar, and select a new color for the selected portion by picking one from the fill color box.

Just click on the color box and select a different color. Youll then see that the new color only applies to the selected portion.

So with merge drawings, you see that we can easily select just a portion of it. The selected portion can then be edited without affecting the rest of the drawing. You can change the selected portions color, modify its shape, move it to a different location, or you can even delete it if youd like.
In the next step, well see if we can do the same thing with the object drawing on the right.
Step 9
So now, while still using the selection tool, well try to select just a portion of the drawing on the right.
Go ahead and click and drag a selection area that just covers a portion of the shape, similar to what we did in step 7.

Once you release the mouse, youll see that even though you selected only a portion of the drawing, the entire shape still gets selected. That is what happens with object drawings. As long as you select even the tiniest portion of the drawing, the entire thing gets selected.
But what can you do if youve got an object drawing, but youd still like to be able to select only a portion of it? The next step will show you how.
Step 10
With object drawings, its still possible to select just a portion of the shape. Theres just an extra step that you have to do.
First, take note of the edit bar, which can be found above the stage. It should say Scene 1.

The edit bar tells you where you are. Right now, you are on scene 1.
Now go ahead and double-click on the object drawing on the right side of the stage.
After you double-click on it, look at the edit bar again. It should now say Scene 1 followed by Drawing Object.

What this means is that you are now inside the drawing object. You should see that you no longer have the box around your drawing. So in a way, its as if you opened the box to get direct access to the artwork inside it. And now that youre inside the box, youll be able to treat the artwork as a merge drawing. So youll now have the ability to select just portions of it instead of the entire shape.
Step 11
Once youre finished editing an object drawing, its important that you go back to the main scene. Otherwise, you might end up inadvertently adding unwanted elements to the object drawing that youre currently editing.
To go back to scene 1, just click on the Scene 1 link in the edit bar.

NOTE: Always be mindful of the edit bar. Its a common mistake for many to accidentally double-click on an object drawing, and then they fail to notice that they are no longer in the main scene, but continue to work as if they are.
In part 2 of this series, well create some object and merge drawing examples using the oval tool.
Understanding the difference between Object Drawing Mode vs Merge Drawing Mode in Flash - PART 2: NEXT >>
Subscribe to:
Posts (Atom)