Showing posts with label beginner. Show all posts
Showing posts with label beginner. Show all posts
Thursday, February 5, 2015
Android beginner tutorial Part 37 GridView widget
In this tutorial well learn how to display text data using GridView widget.
The GridView component displays data in a table structure.
There are a few properties that we can use to customize the appearance of the widget.
The first one is android:numColumns - it determines how many columns the grid has. It can be set to "auto_fit" to fit as many columns as possible.
The android:verticalSpacing and android:horizontalSpacing variables determine the horizontal and vertical spacing between the cells.
The android:columnWidth property sets the width of each column.
The android:stretchMode property determines how the grid is stretched. You can set it to columnWidth to increase the cell width if there is any extra space left, or to spacingWidth to increase the spacing between the cells. Set to none to disable stretching.
Go to activity_main.xml layout file and create a simple layout with a TextView and a GridView:
We need to have an array declared in our strings.xml file. Its the one from the previous tutorials:
Go to MainActivity.java class. Implement OnItemClickListener class:
Declare text and grid variables to later reference the TextView and GridView objects:
Set their value sin onCreate() function. Then retreive the array from the strings.xml and apply it to an array adapter. Apply this adapter to this activity using setAdapter() method, then call setOnItemClickListener() method to add a click listener:
Add a onItemClick() function, which handles the item click event. Display the selected item in the text field:
Full code:
The results look like this:

Thanks for reading!
Read more »
The GridView component displays data in a table structure.
There are a few properties that we can use to customize the appearance of the widget.
The first one is android:numColumns - it determines how many columns the grid has. It can be set to "auto_fit" to fit as many columns as possible.
The android:verticalSpacing and android:horizontalSpacing variables determine the horizontal and vertical spacing between the cells.
The android:columnWidth property sets the width of each column.
The android:stretchMode property determines how the grid is stretched. You can set it to columnWidth to increase the cell width if there is any extra space left, or to spacingWidth to increase the spacing between the cells. Set to none to disable stretching.
Go to activity_main.xml layout file and create a simple layout with a TextView and a GridView:
<LinearLayout xmlns:android="http://schemas.android.com/apk/res/android"
    xmlns:tools="http://schemas.android.com/tools"
    android:layout_width="match_parent"
    android:layout_height="match_parent"
    android:orientation="vertical"
    tools:context=".MainActivity" >

<TextView
    android:id="@+id/text"
    android:layout_width="fill_parent"
    android:layout_height="wrap_content" />

<GridView
    android:id="@+id/grid"
    android:layout_width="fill_parent"
    android:layout_height="fill_parent"
    android:verticalSpacing="35dp"
    android:horizontalSpacing="5dp"
    android:numColumns="auto_fit"
    android:columnWidth="100dp"
    android:stretchMode="columnWidth"
    android:gravity="center"
    />

</LinearLayout>
We need to have an array declared in our strings.xml file. Its the one from the previous tutorials:
<?xml version="1.0" encoding="utf-8"?>
<resources>

    <string name="app_name">Code For Food Test</string>
    <string name="menu_settings">Settings</string>
    <string-array name="choices_array">
        <item>One</item>
        <item>Two</item>
        <item>Three</item>
        <item>Four</item>
        <item>Five</item>
        <item>Seven</item>
        <item>Eight</item>
        <item>Nine</item>
        <item>Ten</item>
    </string-array>

</resources>
Go to MainActivity.java class. Implement OnItemClickListener class:
public class MainActivity extends Activity implements OnItemClickListener{
Declare text and grid variables to later reference the TextView and GridView objects:
private TextView text;
private GridView grid;
Set their value sin onCreate() function. Then retreive the array from the strings.xml and apply it to an array adapter. Apply this adapter to this activity using setAdapter() method, then call setOnItemClickListener() method to add a click listener:
@Override
protected void onCreate(Bundle savedInstanceState) {
super.onCreate(savedInstanceState);
setContentView(R.layout.activity_main);

grid = (GridView)findViewById(R.id.grid);
text = (TextView)findViewById(R.id.text);

String[] choices = getResources().getStringArray(R.array.choices_array);

ArrayAdapter<String> arrayAdapter = new ArrayAdapter<String>(this, android.R.layout.simple_list_item_1, choices);
grid.setAdapter(arrayAdapter);
grid.setOnItemClickListener(this);
}
Add a onItemClick() function, which handles the item click event. Display the selected item in the text field:
public void onItemClick(AdapterView<?> parent, View view, int pos, long id) {
    text.setText("The selected item is " + parent.getItemAtPosition(pos).toString());
    }
Full code:
package com.kircode.codeforfood_test;

import android.app.Activity;
import android.os.Bundle;
import android.view.Menu;
import android.view.View;
import android.widget.AdapterView;
import android.widget.AdapterView.OnItemClickListener;
import android.widget.ArrayAdapter;
import android.widget.GridView;
import android.widget.TextView;

public class MainActivity extends Activity implements OnItemClickListener{

private TextView text;
private GridView grid;

@Override
protected void onCreate(Bundle savedInstanceState) {
super.onCreate(savedInstanceState);
setContentView(R.layout.activity_main);

grid = (GridView)findViewById(R.id.grid);
text = (TextView)findViewById(R.id.text);

String[] choices = getResources().getStringArray(R.array.choices_array);

ArrayAdapter<String> arrayAdapter = new ArrayAdapter<String>(this, android.R.layout.simple_list_item_1, choices);
grid.setAdapter(arrayAdapter);
grid.setOnItemClickListener(this);
}

public void onItemClick(AdapterView<?> parent, View view, int pos, long id) {
    text.setText("The selected item is " + parent.getItemAtPosition(pos).toString());
    }

@Override
public boolean onCreateOptionsMenu(Menu menu) {
// Inflate the menu; this adds items to the action bar if it is present.
getMenuInflater().inflate(R.menu.activity_main, menu);
return true;
}

}
The results look like this:
Thanks for reading!

Android beginner tutorial Part 58 Send and receive data between Activities
In this tutorial well learn how to transfer data between two Activities.
We are going to have two activities - MainActivity and SecondActivity. Ive already covered how to create secondary Activities in the tutorial about Intents. I explained how to do that in detail in that tutorial, so if you followed my tutorials you should be able to do that. A reminder: add an Activity in the Manifest XML file and add a SecondActivity.java class and an activity_second.xml layout.
The main activity is going to have a button that opens a new Activity. However, it launches it with an intention to receive a result. This is done using a startActivityForResult() method. By doing it that way we tell our main activity to expect a result from the Activity were launching. In the second activity well have an EditText input and a button. When the button is pressed, the data in the text field is sent back to the main activity and the second activity is closed.
When the main activity receives the message, it displays it in a toast.
Lets see how we are going to do this. Firstly, go to activity_main.xml layout and add a button:
In MainActivity.java declare an ID for the request:
Use it when you call startActivityForResult() in the click event handler of the button:
The request is sent, but what about receiving the results?
Create a function onActivityResult(). Call its superclass and then check if resultCode parameter equals RESULT_OK. That means weve received a result as expected.
Inside the if...statement declare an "extras" variable, which is a Bundle type object and gets its values from data.getExtras().
Then we check if requestCode parameters value equals IDM_TEST (the id we passed when requesting the result), and if so, toast the results using the extras object:
Full MainActivity.java code:
The activity_second.xml layout has an EditText object and a Button:
In SecondActivity.java class, we only need to handle the button. When it is clicked, we create an intent and use a method called setResult(). To pass the values to the parent activity we can use the putExtra() method of the intent. It has 2 parameters - name and value.
Thats all! Now you can go to the second activity from your main one, enter some text, return to the main activity using the button and see the main activity display the data received from the second one.
Thanks for reading!
Read more »
We are going to have two activities - MainActivity and SecondActivity. Ive already covered how to create secondary Activities in the tutorial about Intents. I explained how to do that in detail in that tutorial, so if you followed my tutorials you should be able to do that. A reminder: add an Activity in the Manifest XML file and add a SecondActivity.java class and an activity_second.xml layout.
The main activity is going to have a button that opens a new Activity. However, it launches it with an intention to receive a result. This is done using a startActivityForResult() method. By doing it that way we tell our main activity to expect a result from the Activity were launching. In the second activity well have an EditText input and a button. When the button is pressed, the data in the text field is sent back to the main activity and the second activity is closed.
When the main activity receives the message, it displays it in a toast.
Lets see how we are going to do this. Firstly, go to activity_main.xml layout and add a button:
<LinearLayout xmlns:android="http://schemas.android.com/apk/res/android"
    xmlns:tools="http://schemas.android.com/tools"
    android:layout_width="match_parent"
    android:layout_height="match_parent"
    android:orientation="vertical"
    tools:context=".MainActivity" >

    <TextView android:layout_width="match_parent"
        android:layout_height="wrap_content"
        android:textSize="32sp"
        android:text="First Activity"
        />

    <Button android:id="@+id/goButton"
        android:layout_width="match_parent"
        android:layout_height="wrap_content"
        android:text="Launch Second Activity"
        />

</LinearLayout>
In MainActivity.java declare an ID for the request:
private static final int IDM_TEST = 101;
Use it when you call startActivityForResult() in the click event handler of the button:
@Override
protected void onCreate(Bundle savedInstanceState) {
super.onCreate(savedInstanceState);
setContentView(R.layout.activity_main);

final Button btn = (Button)findViewById(R.id.goButton);
btn.setOnClickListener(new View.OnClickListener() {

@Override
public void onClick(View v) {
Intent intent = new Intent();
intent.setClass(getApplicationContext(), SecondActivity.class);
startActivityForResult(intent, IDM_TEST);
}
});
}
The request is sent, but what about receiving the results?
Create a function onActivityResult(). Call its superclass and then check if resultCode parameter equals RESULT_OK. That means weve received a result as expected.
Inside the if...statement declare an "extras" variable, which is a Bundle type object and gets its values from data.getExtras().
Then we check if requestCode parameters value equals IDM_TEST (the id we passed when requesting the result), and if so, toast the results using the extras object:
protected void onActivityResult(int requestCode, int resultCode, Intent data){
super.onActivityResult(requestCode, resultCode, data);
if(resultCode == RESULT_OK){
Bundle extras = data.getExtras();
// handle results
if(requestCode == IDM_TEST){
Toast toast = Toast.makeText(MainActivity.this, extras.getString("UserText"), Toast.LENGTH_SHORT);
toast.show();
}
}
}
Full MainActivity.java code:
package com.kircode.codeforfood_test;

import android.app.Activity;
import android.content.Intent;
import android.os.Bundle;
import android.view.View;
import android.widget.Button;
import android.widget.Toast;

public class MainActivity extends Activity{

private static final int IDM_TEST = 101;

@Override
protected void onCreate(Bundle savedInstanceState) {
super.onCreate(savedInstanceState);
setContentView(R.layout.activity_main);

final Button btn = (Button)findViewById(R.id.goButton);
btn.setOnClickListener(new View.OnClickListener() {

@Override
public void onClick(View v) {
Intent intent = new Intent();
intent.setClass(getApplicationContext(), SecondActivity.class);
startActivityForResult(intent, IDM_TEST);
}
});
}

protected void onActivityResult(int requestCode, int resultCode, Intent data){
super.onActivityResult(requestCode, resultCode, data);
if(resultCode == RESULT_OK){
Bundle extras = data.getExtras();
// handle results
if(requestCode == IDM_TEST){
Toast toast = Toast.makeText(MainActivity.this, extras.getString("UserText"), Toast.LENGTH_SHORT);
toast.show();
}
}
}

}
The activity_second.xml layout has an EditText object and a Button:
<LinearLayout xmlns:android="http://schemas.android.com/apk/res/android"
    xmlns:tools="http://schemas.android.com/tools"
    android:layout_width="match_parent"
    android:layout_height="match_parent"
    android:orientation="vertical"
    tools:context=".MainActivity" >

    <TextView android:layout_width="match_parent"
        android:layout_height="wrap_content"
        android:textSize="32sp"
        android:text="Second Activity"
        />

    <EditText android:layout_width="match_parent"
        android:layout_height="wrap_content"
        android:hint="Write something here..."
        android:id="@+id/editText"
        />

    <Button android:id="@+id/backButton"
        android:layout_width="match_parent"
        android:layout_height="wrap_content"
        android:text="OK"
        />

</LinearLayout>
In SecondActivity.java class, we only need to handle the button. When it is clicked, we create an intent and use a method called setResult(). To pass the values to the parent activity we can use the putExtra() method of the intent. It has 2 parameters - name and value.
package com.kircode.codeforfood_test;

import android.app.Activity;
import android.content.Intent;
import android.os.Bundle;
import android.view.View;
import android.widget.Button;
import android.widget.EditText;

public class SecondActivity extends Activity{


@Override
protected void onCreate(Bundle savedInstanceState) {
super.onCreate(savedInstanceState);
setContentView(R.layout.activity_second);

final Button btn = (Button)findViewById(R.id.backButton);
btn.setOnClickListener(new View.OnClickListener() {

@Override
public void onClick(View v) {
EditText text = (EditText)findViewById(R.id.editText);

Intent intent = new Intent();
intent.putExtra("UserText", text.getText().toString());
setResult(RESULT_OK, intent);
finish();
}
});
}

}
Thats all! Now you can go to the second activity from your main one, enter some text, return to the main activity using the button and see the main activity display the data received from the second one.
Thanks for reading!
Wednesday, February 4, 2015
Android beginner tutorial Part 69 Queries and Cursors
In this tutorial we will add our Content Provider to the Manifest xml and learn a bit about queries and cursors.
To make a Content Provider visible and usable by the system and your own application, we need to add it to the AndroidManifest.xml file of our project.
Add a new node provider to the application node, set values for two of its attributes - android:name and android:authorities. The name attribute points to the custom ContentProvider class, and the authorities value is the URI address of the provider:
To send SQL queries to the content provider from your application, use the ContentResolver object that is obtainable using getContentResolver() method.
For example, this way we can send a query that selects all names and phones of the people in our database.
The query() method, for instance, has 5 parameters. Those are the URI address of the provider, the projection (list of columns to return, if null - everything is returned), selection (what would normally be written after "WHERE" in an SQL command), selectionArgs (extra functionality for selection parameter) and sortOrder (what would normally be written after "ORDER BY").
The Cursor object thats returned to us is a helpful tool for navigating through the results of the query. It has a set of useful methods like moveToFirst(), moveToLast(), moveToNext(), moveToPrevious(), moveToPosition(), getToPosition() and more.
Since the Cursor lines up all the results in some sort of a row and moves back and forth displaying one at a time, there are a few methods that let us know where exactly the cursor is currently located. These methods are isFirst(), isLast(), isBeforeFirst() and isAfterLast().
The insert(), update() and delete() methods are also all called from the ContentResolver object, but they dont result any Cusors. They are even simpler commands that basically insert, update and delete rows in a table.
Thats all for today.
Thanks for reading!
Read more »
To make a Content Provider visible and usable by the system and your own application, we need to add it to the AndroidManifest.xml file of our project.
Add a new node provider to the application node, set values for two of its attributes - android:name and android:authorities. The name attribute points to the custom ContentProvider class, and the authorities value is the URI address of the provider:
        <provider
            android:name="com.kircode.codeforfood_test.myContentProvider"
            android:authorities="com.kircode.codeforfood_test.contactprovider">
        </provider>
To send SQL queries to the content provider from your application, use the ContentResolver object that is obtainable using getContentResolver() method.
For example, this way we can send a query that selects all names and phones of the people in our database.
String[] columns = new String[] {myDbHelper.NAME, myDbHelper.PHONE};
ContentResolver resolver = getContentResolver();
Cursor cursor = resolver.query(CONTENT_URI, columns, null, null, null);
The query() method, for instance, has 5 parameters. Those are the URI address of the provider, the projection (list of columns to return, if null - everything is returned), selection (what would normally be written after "WHERE" in an SQL command), selectionArgs (extra functionality for selection parameter) and sortOrder (what would normally be written after "ORDER BY").
The Cursor object thats returned to us is a helpful tool for navigating through the results of the query. It has a set of useful methods like moveToFirst(), moveToLast(), moveToNext(), moveToPrevious(), moveToPosition(), getToPosition() and more.
Since the Cursor lines up all the results in some sort of a row and moves back and forth displaying one at a time, there are a few methods that let us know where exactly the cursor is currently located. These methods are isFirst(), isLast(), isBeforeFirst() and isAfterLast().
The insert(), update() and delete() methods are also all called from the ContentResolver object, but they dont result any Cusors. They are even simpler commands that basically insert, update and delete rows in a table.
Thats all for today.
Thanks for reading!
Tuesday, February 3, 2015
Android beginner tutorial Part 40 AlertDialog class
Today well learn about the AlertDialog class.
There are many types of Dialogs in Android - pop up windows that inform, confirm or request data from the user. Today well take a look at the AlertDialog class - a simple pop up dialog window that can display a title, a text message, and up to 3 buttons - a positive one, a negative one and a neutral one. Its also possible to display more complex things here like lists and switches, but well get to that later.
First, go to the main Activity layout XML and add a button.
Now go to MainActivity.java class. Here, create a reference to the button in the layout and add a click event listener for it.
In the onClick handler function of the listener, well create the AlertDialog. First, declare a builder variable of AlertDialog.Builder class.
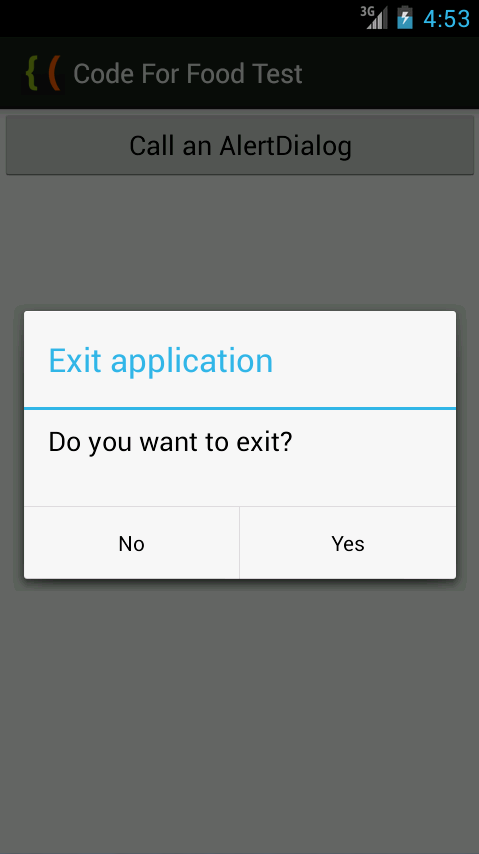
Now we can customize it. I want the dialog window to have 2 buttons - Yes and No, and the Yes button closes the application, while the No button closes just the dialog.
Set the title and message of the dialog:
Create a positive button using setPositiveButton() method. It has 2 parameters - label of the button and OnClickListener of the button. We can close the application using MainActivity.this.finish():
Negative button is created similarly:
Then we can make it impossible for the user to close the dialog by pressing "Back" button on their device. Do this using the setCancelable() method:
Create an AlertDialog instance, set its value to builder.create(). Then use show() method of the dialog to display it.
Full MainActivity.java code:
The results look like this:
Thanks for reading!
Read more »
There are many types of Dialogs in Android - pop up windows that inform, confirm or request data from the user. Today well take a look at the AlertDialog class - a simple pop up dialog window that can display a title, a text message, and up to 3 buttons - a positive one, a negative one and a neutral one. Its also possible to display more complex things here like lists and switches, but well get to that later.
First, go to the main Activity layout XML and add a button.
<LinearLayout xmlns:android="http://schemas.android.com/apk/res/android"
    xmlns:tools="http://schemas.android.com/tools"
    android:layout_width="match_parent"
    android:layout_height="match_parent"
    android:orientation="vertical"
    tools:context=".MainActivity" >

<Button
    android:id="@+id/testButton"
    android:layout_width="fill_parent"
    android:layout_height="wrap_content"
    android:text="Call an AlertDialog"
    />

</LinearLayout>
Now go to MainActivity.java class. Here, create a reference to the button in the layout and add a click event listener for it.
In the onClick handler function of the listener, well create the AlertDialog. First, declare a builder variable of AlertDialog.Builder class.
AlertDialog.Builder builder = new AlertDialog.Builder(MainActivity.this);
Now we can customize it. I want the dialog window to have 2 buttons - Yes and No, and the Yes button closes the application, while the No button closes just the dialog.
Set the title and message of the dialog:
builder.setTitle("Exit application");
builder.setMessage("Do you want to exit?");
Create a positive button using setPositiveButton() method. It has 2 parameters - label of the button and OnClickListener of the button. We can close the application using MainActivity.this.finish():
builder.setPositiveButton("Yes", new DialogInterface.OnClickListener() {
@Override
public void onClick(DialogInterface dialog, int which) {
MainActivity.this.finish();
}
});
Negative button is created similarly:
builder.setNegativeButton("No", new DialogInterface.OnClickListener() {
@Override
public void onClick(DialogInterface dialog, int which) {
dialog.cancel();
}
});
Then we can make it impossible for the user to close the dialog by pressing "Back" button on their device. Do this using the setCancelable() method:
builder.setCancelable(false);
Create an AlertDialog instance, set its value to builder.create(). Then use show() method of the dialog to display it.
AlertDialog myDialog = builder.create();
myDialog.show();
Full MainActivity.java code:
package com.kircode.codeforfood_test;

import android.app.Activity;
import android.app.AlertDialog;
import android.content.DialogInterface;
import android.os.Bundle;
import android.view.Menu;
import android.view.View;
import android.widget.Button;

public class MainActivity extends Activity{

@Override
protected void onCreate(Bundle savedInstanceState) {
super.onCreate(savedInstanceState);
setContentView(R.layout.activity_main);

Button button = (Button)findViewById(R.id.testButton);

button.setOnClickListener(new View.OnClickListener() {

@Override
public void onClick(View v) {
AlertDialog.Builder builder = new AlertDialog.Builder(MainActivity.this);
builder.setTitle("Exit application");
builder.setMessage("Do you want to exit?");
builder.setPositiveButton("Yes", new DialogInterface.OnClickListener() {
@Override
public void onClick(DialogInterface dialog, int which) {
MainActivity.this.finish();
}
});

builder.setNegativeButton("No", new DialogInterface.OnClickListener() {
@Override
public void onClick(DialogInterface dialog, int which) {
dialog.cancel();
}
});

builder.setCancelable(false);
AlertDialog myDialog = builder.create();
myDialog.show();
}
});
}

@Override
public boolean onCreateOptionsMenu(Menu menu) {
// Inflate the menu; this adds items to the action bar if it is present.
getMenuInflater().inflate(R.menu.activity_main, menu);
return true;
}

}
The results look like this:
Thanks for reading!
Wednesday, January 28, 2015
Android beginner tutorial Part 78 Creating Preferences Activity
In this tutorial we will create a preferences activity that can be invoked using the application menu.
First of all well need to create the xml that contains all the preferences in the settings menu. Go to the layout directory of your applications project and add a new file preferences.xml.
Add this code:
The key property is used as an identificator for this setting. It has to be a unique string. The title value is the text representation of the setting, and summary is the description of the setting item.
Go to strings.xml file to set the missing string values:
Create a new Activity in the same directory as the MainActivity.java class, call it TestPreferences.java.
Heres the code that applies the xml layout of the preferences page:
Now go to AndroidManifest.file of the application and add this line to the application node:
Doing so will tell Android that theres an Activity with that name in our application.
Now go to MainActivity.java class, add some code that creates an options menu and handles item selection in the menu. When the Settings item is selected, the preferences screen pops up:
And thats all for today! Changing the preference doesnt really do anything yet, but well work on that next time.
Thanks for reading!
Read more »
First of all well need to create the xml that contains all the preferences in the settings menu. Go to the layout directory of your applications project and add a new file preferences.xml.
Add this code:
<?xml version="1.0" encoding="utf-8"?>
<PreferenceScreen xmlns:android="http://schemas.android.com/apk/res/android">
    <CheckBoxPreference
        android:key="pref_mute"
        android:title="@string/pref_mute"
        android:summary="@string/pref_mute_summ"
        android:defaultValue="false" />

</PreferenceScreen>
The key property is used as an identificator for this setting. It has to be a unique string. The title value is the text representation of the setting, and summary is the description of the setting item.
Go to strings.xml file to set the missing string values:
<?xml version="1.0" encoding="utf-8"?>
<resources>

    <string name="app_name">CodeForFood Test Two</string>
    <string name="pref_mute">Mute</string>
    <string name="pref_mute_summ">Disable all the sound in the application</string>
    <string name="menu_settings">Settings</string>

</resources>
Create a new Activity in the same directory as the MainActivity.java class, call it TestPreferences.java.
Heres the code that applies the xml layout of the preferences page:
package com.example.codeforfoodtest_two;

import android.os.Bundle;
import android.preference.PreferenceActivity;

public class TestPreferences extends PreferenceActivity {

@Override
public void onCreate(Bundle savedInstanceState) {
    super.onCreate(savedInstanceState);
    addPreferencesFromResource(R.layout.preferences);
}

}
Now go to AndroidManifest.file of the application and add this line to the application node:
<activity android:name="TestPreferences"></activity>
Doing so will tell Android that theres an Activity with that name in our application.
Now go to MainActivity.java class, add some code that creates an options menu and handles item selection in the menu. When the Settings item is selected, the preferences screen pops up:
package com.example.codeforfoodtest_two;

import android.app.Activity;
import android.content.Intent;
import android.os.Bundle;
import android.view.Menu;
import android.view.MenuItem;

public class MainActivity extends Activity{

static final int IDM_SETTINGS = 101;

@Override
protected void onCreate(Bundle savedInstanceState) {
super.onCreate(savedInstanceState);
setContentView(R.layout.activity_main);
}

@Override
public boolean onCreateOptionsMenu(Menu menu){
menu.add(Menu.NONE, IDM_SETTINGS, Menu.NONE, R.string.menu_settings);
return(super.onCreateOptionsMenu(menu));
}

@Override
public boolean onOptionsItemSelected(MenuItem item){
if(item.getItemId()==IDM_SETTINGS){
Intent intent = new Intent();
intent.setClass(this, TestPreferences.class);
startActivity(intent);
}
return true;
}
}
And thats all for today! Changing the preference doesnt really do anything yet, but well work on that next time.
Thanks for reading!
Android beginner tutorial Part 31 Displaying data using AdapterView widgets
Today well learn the mechanics behind displaying text data in list widgets.
There are multiple list type widgets in Android. The most common ones are ListView, GridView, and Spinner (Gallery and SlidingDrawer classes once were a part of this list, but now they are deprecated). They are all subclasses of AdapterView class, which is a view whose children are determined by an Adapter.
If you read my previous tutorials, you already know that an Adapter is a bridge between a data provider and the widget that displays the data. It provides access to each element of the data and also takes care of displaying each item in the data by creating View objects.
All the AdapterView subclasses are containers that displays the given data in a specific way and handles all the user interaction events with each of the children, that are generated from the data.
There are multiple variations of the Adapter class for specific uses. For example, we already know about the ArrayAdapter - it lets us use the data from an array to display it in a widget (in the previous tutorials, we displayed it in AutoCompleteTextView and MultiAutoCompleteTextView objects).
Another common adapter is CursorAdapter, which is used for reading and displaying data from Cursor objects. A Cursor is an interface that provides read-write access to the resulted data returned from a database query.
It is possible to create your own custom Adapter classes for more specific needs. It is also possible to create your own AdapterView classes, which display the provided data.
The AdapterView class is the base class for AbsListView and AbsSpinner classes. The AbsListView class can be extended to display data in a list-type way - it is used in ListView and GridView components. The AbsSpinner class is used for dropdown lists in Spinner widget.
Thats the basic idea behind displaying provided data in list widgets.
We are now able to start learning separate list widgets in detail.
Thanks for reading!
Read more »
There are multiple list type widgets in Android. The most common ones are ListView, GridView, and Spinner (Gallery and SlidingDrawer classes once were a part of this list, but now they are deprecated). They are all subclasses of AdapterView class, which is a view whose children are determined by an Adapter.
If you read my previous tutorials, you already know that an Adapter is a bridge between a data provider and the widget that displays the data. It provides access to each element of the data and also takes care of displaying each item in the data by creating View objects.
All the AdapterView subclasses are containers that displays the given data in a specific way and handles all the user interaction events with each of the children, that are generated from the data.
There are multiple variations of the Adapter class for specific uses. For example, we already know about the ArrayAdapter - it lets us use the data from an array to display it in a widget (in the previous tutorials, we displayed it in AutoCompleteTextView and MultiAutoCompleteTextView objects).
Another common adapter is CursorAdapter, which is used for reading and displaying data from Cursor objects. A Cursor is an interface that provides read-write access to the resulted data returned from a database query.
It is possible to create your own custom Adapter classes for more specific needs. It is also possible to create your own AdapterView classes, which display the provided data.
The AdapterView class is the base class for AbsListView and AbsSpinner classes. The AbsListView class can be extended to display data in a list-type way - it is used in ListView and GridView components. The AbsSpinner class is used for dropdown lists in Spinner widget.
Thats the basic idea behind displaying provided data in list widgets.
We are now able to start learning separate list widgets in detail.
Thanks for reading!
Monday, January 26, 2015
Android beginner tutorial Part 21 Tab navigation using TabHost and TabWidget
In this part we will learn about tab navigation in Android SDK using TabHost and TabWidget widgets.
To add tabbed navigation to your application, you need to use a TabHost and a TabWidget objects. The TabHost must be the root node for the layout, which contains a TabWidget object for displaying the tabs and a FrameLayout container for displaying content of the tabs.
Go to activity_main.xml and use this code:
As you can see, Ive given the TabHost object id of tabhost. It contains a TabWidget and a FrameLayout. The ids of those are "tabs" and "tabcontent", note that they have @android prefix and no + symbol. This means that these ids will always be the same - the program expects exactly these ids for these elements.
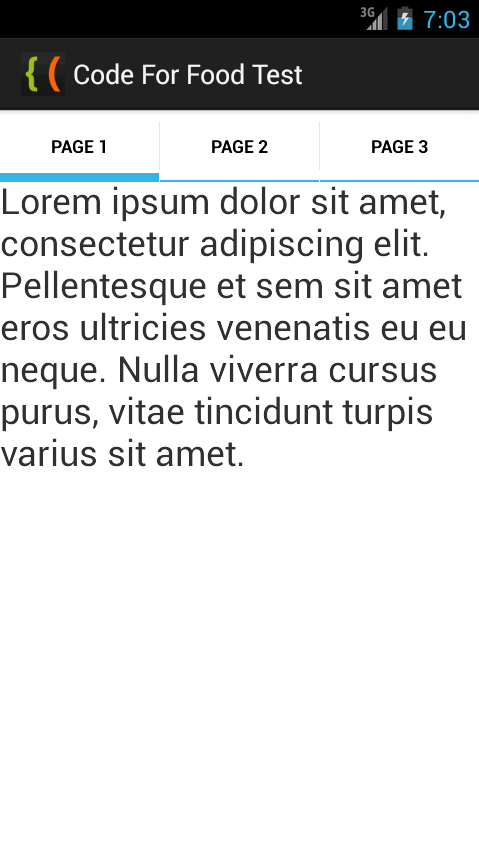
Inside of the FrameLayout I added 3 TextViews that display text. Each tab will display one of the text views.
Go to strings.xml and update it so that it contains the 3 placeholder text pieces:
Now go to MainActivity.java class. We are now going to actually set up the navigation.
In the onCreate() function, declare a "tabs" variable that is a reference to the "tabhost" TabHost object. Call its setup() method.
The setup() method initializes the tab container. You need to call it before actually adding tabs.
After that we declare a "spec" variable, which is an intasnce of TabHost class internal class TabSpec. Set it to a new tab spec object using newTabSpec() method. Pass an id as the parameter of this function that represents this spec object.
A TabSpec is basically an information holder, which contains properties that determine how a single tab is going to look. It contains properties like tab title and its content.
Use the setContent() and setIndicator() methods for the spec object to initialize all 3 tabs. When youre done with one tab, add it to tabhost using addTab() method of the TabHost. Then create a new spec and repeat the same process, until you have all 3 tabs initialized.
Then we call the setCurrentTab() method of the tab host to set which tab should be open by default:
Full class code:
Test your application and it should look something like this:
Thanks for reading!
Read more »
To add tabbed navigation to your application, you need to use a TabHost and a TabWidget objects. The TabHost must be the root node for the layout, which contains a TabWidget object for displaying the tabs and a FrameLayout container for displaying content of the tabs.
Go to activity_main.xml and use this code:
<TabHost xmlns:android="http://schemas.android.com/apk/res/android"
    xmlns:tools="http://schemas.android.com/tools"
    android:layout_width="match_parent"
    android:layout_height="match_parent"
    android:id="@+id/tabhost"
    tools:context=".MainActivity" >

    <TabWidget
        android:id="@android:id/tabs"
        android:layout_width="match_parent"
        android:layout_height="wrap_content"
        />

    <FrameLayout
        android:id="@android:id/tabcontent"
        android:layout_width="match_parent"
        android:layout_height="match_parent"
        android:paddingTop="65px"
        >

    <TextView
        android:layout_height="wrap_content"
        android:layout_width="match_parent"
        android:text="@string/text1"
        android:id="@+id/content1"
        android:textSize="24sp"
        />

    <TextView
        android:layout_height="wrap_content"
        android:layout_width="match_parent"
        android:text="@string/text2"
        android:id="@+id/content2"
        android:textSize="24sp"
        />

    <TextView
        android:layout_height="wrap_content"
        android:layout_width="match_parent"
        android:text="@string/text3"
        android:id="@+id/content3"
        android:textSize="24sp"
        />

    </FrameLayout>

</TabHost>
As you can see, Ive given the TabHost object id of tabhost. It contains a TabWidget and a FrameLayout. The ids of those are "tabs" and "tabcontent", note that they have @android prefix and no + symbol. This means that these ids will always be the same - the program expects exactly these ids for these elements.
Inside of the FrameLayout I added 3 TextViews that display text. Each tab will display one of the text views.
Go to strings.xml and update it so that it contains the 3 placeholder text pieces:
<?xml version="1.0" encoding="utf-8"?>
<resources>

    <string name="app_name">Code For Food Test</string>
    <string name="text1">Lorem ipsum dolor sit amet, consectetur adipiscing elit. Pellentesque et sem sit amet eros ultricies venenatis eu eu neque. Nulla viverra cursus purus, vitae tincidunt turpis varius sit amet.</string>
    <string name="text2">Duis ut sapien sit amet massa dapibus molestie. Mauris condimentum nisi sit amet turpis molestie in tempor neque interdum.</string>
    <string name="text3">Quisque eu justo nisi, eu interdum felis. Nam vel mi nibh. Curabitur egestas ornare mi, vel convallis ligula tempor vitae.</string>
    <string name="menu_settings">Settings</string>

</resources>
Now go to MainActivity.java class. We are now going to actually set up the navigation.
In the onCreate() function, declare a "tabs" variable that is a reference to the "tabhost" TabHost object. Call its setup() method.
TabHost tabs = (TabHost)findViewById(R.id.tabhost);
tabs.setup();
The setup() method initializes the tab container. You need to call it before actually adding tabs.
After that we declare a "spec" variable, which is an intasnce of TabHost class internal class TabSpec. Set it to a new tab spec object using newTabSpec() method. Pass an id as the parameter of this function that represents this spec object.
TabHost.TabSpec spec = tabs.newTabSpec("tab1");
A TabSpec is basically an information holder, which contains properties that determine how a single tab is going to look. It contains properties like tab title and its content.
Use the setContent() and setIndicator() methods for the spec object to initialize all 3 tabs. When youre done with one tab, add it to tabhost using addTab() method of the TabHost. Then create a new spec and repeat the same process, until you have all 3 tabs initialized.
spec.setContent(R.id.content1);
spec.setIndicator("Page 1");
tabs.addTab(spec);

spec = tabs.newTabSpec("tab2");
spec.setContent(R.id.content2);
spec.setIndicator("Page 2");
tabs.addTab(spec);

spec = tabs.newTabSpec("tab3");
spec.setContent(R.id.content3);
spec.setIndicator("Page 3");
tabs.addTab(spec);
Then we call the setCurrentTab() method of the tab host to set which tab should be open by default:
tabs.setCurrentTab(0);
Full class code:
package com.kircode.codeforfood_test;

import android.app.Activity;
import android.os.Bundle;
import android.view.Menu;
import android.widget.TabHost;

public class MainActivity extends Activity{

@Override
protected void onCreate(Bundle savedInstanceState) {
super.onCreate(savedInstanceState);
setContentView(R.layout.activity_main);

TabHost tabs = (TabHost)findViewById(R.id.tabhost);
tabs.setup();

TabHost.TabSpec spec = tabs.newTabSpec("tab1");

spec.setContent(R.id.content1);
spec.setIndicator("Page 1");
tabs.addTab(spec);

spec = tabs.newTabSpec("tab2");
spec.setContent(R.id.content2);
spec.setIndicator("Page 2");
tabs.addTab(spec);

spec = tabs.newTabSpec("tab3");
spec.setContent(R.id.content3);
spec.setIndicator("Page 3");
tabs.addTab(spec);

tabs.setCurrentTab(0);
}

@Override
public boolean onCreateOptionsMenu(Menu menu) {
// Inflate the menu; this adds items to the action bar if it is present.
getMenuInflater().inflate(R.menu.activity_main, menu);
return true;
}

}
Test your application and it should look something like this:
Thanks for reading!
Android beginner tutorial Part 38 Toast notifications
In this tutorial well learn about Toast notifications.
There are two types of notifications in Android - Toasts and Status Bar Notifications (often called just Notifications). The difference between the two is that the Toast notifications just appear somewhere on the screen for a certain period of time, and do not require user interaction. The Notifications appear in the status bar, and can be interacted with.
Today well learn about Toasts. The Toast class is a class for displaying native notifications for a set period of time. They are very simple to implement, and thats why are often used in debugging.
Creating a Toast requires calling 2 methods of a Toast object - makeText() and show(). The makeText() function requires three parameters - context, message and displaying time.
The third parameter can be set to two constants - Toast.LENGTH_SHORT or Toast.LENGTH_LONG. You can also just set the value to a number of milliseconds.
The Toast message appears in the bottom part of the screen by default, but it is possible to change the position using the setGravity() method. It has 3 parameters, all of them are integers.
The first one is a constant that determines where the message box is relatively located. The constants are declared in the Gravity class. For example, the values can be set to Gravity.CENTER or Gravity.TOP To combine two constants, use Gravity.TOP|Gravity.LEFT.
The second and third parameters are used to set X and Y offsets.
So, by setting the gravity like this:
...it will be positioned in the center of the screen. You can then move it using the offset values, for example, you can move it 10 pixels to the right by using:
Lets create an example application. The Activity layout will consist of just a button:
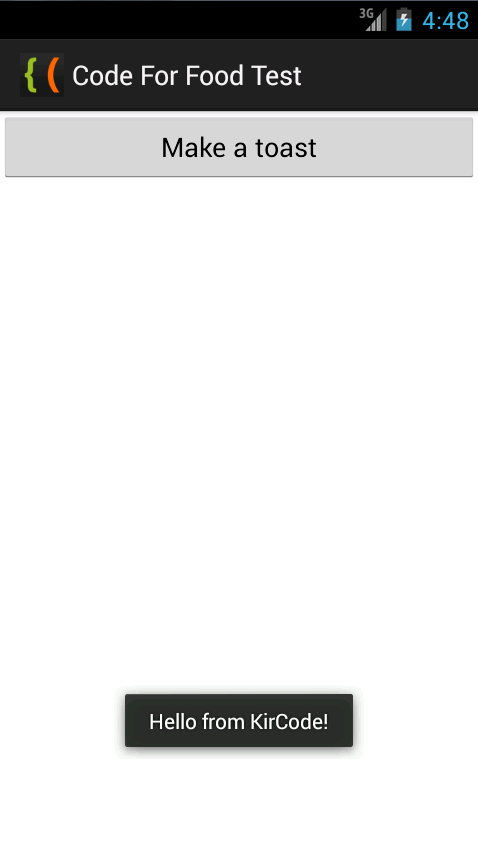
The MainActivity.java class handles the click event of the button and displays a Toast notification when its clicked:
The results look like this (with notification on screen):
Thanks for reading!
Read more »
There are two types of notifications in Android - Toasts and Status Bar Notifications (often called just Notifications). The difference between the two is that the Toast notifications just appear somewhere on the screen for a certain period of time, and do not require user interaction. The Notifications appear in the status bar, and can be interacted with.
Today well learn about Toasts. The Toast class is a class for displaying native notifications for a set period of time. They are very simple to implement, and thats why are often used in debugging.
Creating a Toast requires calling 2 methods of a Toast object - makeText() and show(). The makeText() function requires three parameters - context, message and displaying time.
Context context = getApplicationContext();
Toast toast = Toast.makeText(context, "Hello from KirCode!", Toast.LENGTH_SHORT);
toast.show();
The third parameter can be set to two constants - Toast.LENGTH_SHORT or Toast.LENGTH_LONG. You can also just set the value to a number of milliseconds.
The Toast message appears in the bottom part of the screen by default, but it is possible to change the position using the setGravity() method. It has 3 parameters, all of them are integers.
The first one is a constant that determines where the message box is relatively located. The constants are declared in the Gravity class. For example, the values can be set to Gravity.CENTER or Gravity.TOP To combine two constants, use Gravity.TOP|Gravity.LEFT.
The second and third parameters are used to set X and Y offsets.
So, by setting the gravity like this:
toast.setGravity(Gravity.CENTER, 0, 0);
...it will be positioned in the center of the screen. You can then move it using the offset values, for example, you can move it 10 pixels to the right by using:
toast.setGravity(Gravity.CENTER, 10, 0);
Lets create an example application. The Activity layout will consist of just a button:
<LinearLayout xmlns:android="http://schemas.android.com/apk/res/android"
    xmlns:tools="http://schemas.android.com/tools"
    android:layout_width="match_parent"
    android:layout_height="match_parent"
    android:orientation="vertical"
    tools:context=".MainActivity" >

<Button
    android:id="@+id/testButton"
    android:layout_width="fill_parent"
    android:layout_height="wrap_content"
    android:text="Make a toast"
    />

</LinearLayout>
The MainActivity.java class handles the click event of the button and displays a Toast notification when its clicked:
package com.kircode.codeforfood_test;

import android.app.Activity;
import android.content.Context;
import android.os.Bundle;
import android.view.Menu;
import android.view.View;
import android.widget.Button;
import android.widget.Toast;

public class MainActivity extends Activity{

private Context context;

@Override
protected void onCreate(Bundle savedInstanceState) {
super.onCreate(savedInstanceState);
setContentView(R.layout.activity_main);

Button button = (Button)findViewById(R.id.testButton);
context = getApplicationContext();

button.setOnClickListener(new View.OnClickListener() {

@Override
public void onClick(View v) {
Toast toast = Toast.makeText(context, "Hello from KirCode!", Toast.LENGTH_SHORT);
toast.show();
}
});
}

@Override
public boolean onCreateOptionsMenu(Menu menu) {
// Inflate the menu; this adds items to the action bar if it is present.
getMenuInflater().inflate(R.menu.activity_main, menu);
return true;
}

}
The results look like this (with notification on screen):
Thanks for reading!
Subscribe to:
Posts (Atom)