Monday, January 26, 2015
Android beginner tutorial Part 38 Toast notifications
There are two types of notifications in Android - Toasts and Status Bar Notifications (often called just Notifications). The difference between the two is that the Toast notifications just appear somewhere on the screen for a certain period of time, and do not require user interaction. The Notifications appear in the status bar, and can be interacted with.
Today well learn about Toasts. The Toast class is a class for displaying native notifications for a set period of time. They are very simple to implement, and thats why are often used in debugging.
Creating a Toast requires calling 2 methods of a Toast object - makeText() and show(). The makeText() function requires three parameters - context, message and displaying time.
Context context = getApplicationContext();
Toast toast = Toast.makeText(context, "Hello from KirCode!", Toast.LENGTH_SHORT);
toast.show();
The third parameter can be set to two constants - Toast.LENGTH_SHORT or Toast.LENGTH_LONG. You can also just set the value to a number of milliseconds.
The Toast message appears in the bottom part of the screen by default, but it is possible to change the position using the setGravity() method. It has 3 parameters, all of them are integers.
The first one is a constant that determines where the message box is relatively located. The constants are declared in the Gravity class. For example, the values can be set to Gravity.CENTER or Gravity.TOP To combine two constants, use Gravity.TOP|Gravity.LEFT.
The second and third parameters are used to set X and Y offsets.
So, by setting the gravity like this:
toast.setGravity(Gravity.CENTER, 0, 0);
...it will be positioned in the center of the screen. You can then move it using the offset values, for example, you can move it 10 pixels to the right by using:
toast.setGravity(Gravity.CENTER, 10, 0);
Lets create an example application. The Activity layout will consist of just a button:
<LinearLayout xmlns:android="http://schemas.android.com/apk/res/android"
    xmlns:tools="http://schemas.android.com/tools"
    android:layout_width="match_parent"
    android:layout_height="match_parent"
    android:orientation="vertical"
    tools:context=".MainActivity" >

<Button
    android:id="@+id/testButton"
    android:layout_width="fill_parent"
    android:layout_height="wrap_content"
    android:text="Make a toast"
    />

</LinearLayout>
The MainActivity.java class handles the click event of the button and displays a Toast notification when its clicked:
package com.kircode.codeforfood_test;

import android.app.Activity;
import android.content.Context;
import android.os.Bundle;
import android.view.Menu;
import android.view.View;
import android.widget.Button;
import android.widget.Toast;

public class MainActivity extends Activity{

private Context context;

@Override
protected void onCreate(Bundle savedInstanceState) {
super.onCreate(savedInstanceState);
setContentView(R.layout.activity_main);

Button button = (Button)findViewById(R.id.testButton);
context = getApplicationContext();

button.setOnClickListener(new View.OnClickListener() {

@Override
public void onClick(View v) {
Toast toast = Toast.makeText(context, "Hello from KirCode!", Toast.LENGTH_SHORT);
toast.show();
}
});
}

@Override
public boolean onCreateOptionsMenu(Menu menu) {
// Inflate the menu; this adds items to the action bar if it is present.
getMenuInflater().inflate(R.menu.activity_main, menu);
return true;
}

}
The results look like this (with notification on screen):
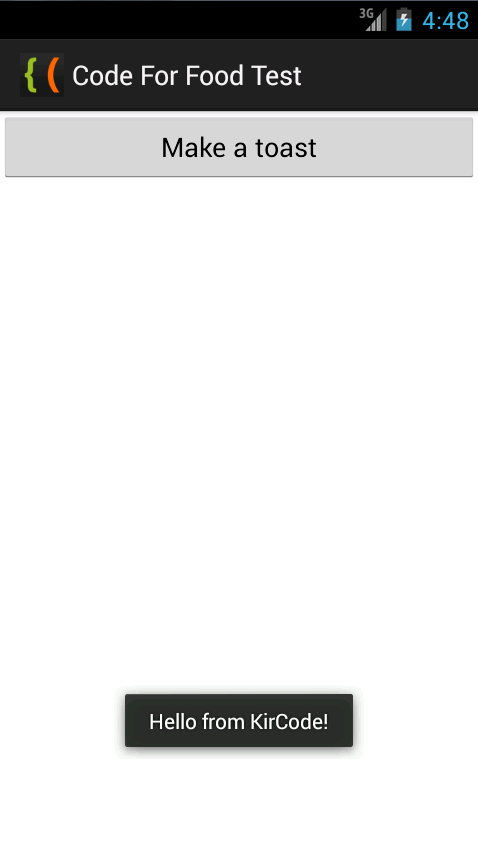
Thanks for reading!
Subscribe to:
Post Comments (Atom)
No comments:
Post a Comment
Note: Only a member of this blog may post a comment.