Monday, January 26, 2015
Android beginner tutorial Part 21 Tab navigation using TabHost and TabWidget
To add tabbed navigation to your application, you need to use a TabHost and a TabWidget objects. The TabHost must be the root node for the layout, which contains a TabWidget object for displaying the tabs and a FrameLayout container for displaying content of the tabs.
Go to activity_main.xml and use this code:
<TabHost xmlns:android="http://schemas.android.com/apk/res/android"
    xmlns:tools="http://schemas.android.com/tools"
    android:layout_width="match_parent"
    android:layout_height="match_parent"
    android:id="@+id/tabhost"
    tools:context=".MainActivity" >

    <TabWidget
        android:id="@android:id/tabs"
        android:layout_width="match_parent"
        android:layout_height="wrap_content"
        />

    <FrameLayout
        android:id="@android:id/tabcontent"
        android:layout_width="match_parent"
        android:layout_height="match_parent"
        android:paddingTop="65px"
        >

    <TextView
        android:layout_height="wrap_content"
        android:layout_width="match_parent"
        android:text="@string/text1"
        android:id="@+id/content1"
        android:textSize="24sp"
        />

    <TextView
        android:layout_height="wrap_content"
        android:layout_width="match_parent"
        android:text="@string/text2"
        android:id="@+id/content2"
        android:textSize="24sp"
        />

    <TextView
        android:layout_height="wrap_content"
        android:layout_width="match_parent"
        android:text="@string/text3"
        android:id="@+id/content3"
        android:textSize="24sp"
        />

    </FrameLayout>

</TabHost>
As you can see, Ive given the TabHost object id of tabhost. It contains a TabWidget and a FrameLayout. The ids of those are "tabs" and "tabcontent", note that they have @android prefix and no + symbol. This means that these ids will always be the same - the program expects exactly these ids for these elements.
Inside of the FrameLayout I added 3 TextViews that display text. Each tab will display one of the text views.
Go to strings.xml and update it so that it contains the 3 placeholder text pieces:
<?xml version="1.0" encoding="utf-8"?>
<resources>

    <string name="app_name">Code For Food Test</string>
    <string name="text1">Lorem ipsum dolor sit amet, consectetur adipiscing elit. Pellentesque et sem sit amet eros ultricies venenatis eu eu neque. Nulla viverra cursus purus, vitae tincidunt turpis varius sit amet.</string>
    <string name="text2">Duis ut sapien sit amet massa dapibus molestie. Mauris condimentum nisi sit amet turpis molestie in tempor neque interdum.</string>
    <string name="text3">Quisque eu justo nisi, eu interdum felis. Nam vel mi nibh. Curabitur egestas ornare mi, vel convallis ligula tempor vitae.</string>
    <string name="menu_settings">Settings</string>

</resources>
Now go to MainActivity.java class. We are now going to actually set up the navigation.
In the onCreate() function, declare a "tabs" variable that is a reference to the "tabhost" TabHost object. Call its setup() method.
TabHost tabs = (TabHost)findViewById(R.id.tabhost);
tabs.setup();
The setup() method initializes the tab container. You need to call it before actually adding tabs.
After that we declare a "spec" variable, which is an intasnce of TabHost class internal class TabSpec. Set it to a new tab spec object using newTabSpec() method. Pass an id as the parameter of this function that represents this spec object.
TabHost.TabSpec spec = tabs.newTabSpec("tab1");
A TabSpec is basically an information holder, which contains properties that determine how a single tab is going to look. It contains properties like tab title and its content.
Use the setContent() and setIndicator() methods for the spec object to initialize all 3 tabs. When youre done with one tab, add it to tabhost using addTab() method of the TabHost. Then create a new spec and repeat the same process, until you have all 3 tabs initialized.
spec.setContent(R.id.content1);
spec.setIndicator("Page 1");
tabs.addTab(spec);

spec = tabs.newTabSpec("tab2");
spec.setContent(R.id.content2);
spec.setIndicator("Page 2");
tabs.addTab(spec);

spec = tabs.newTabSpec("tab3");
spec.setContent(R.id.content3);
spec.setIndicator("Page 3");
tabs.addTab(spec);
Then we call the setCurrentTab() method of the tab host to set which tab should be open by default:
tabs.setCurrentTab(0);
Full class code:
package com.kircode.codeforfood_test;

import android.app.Activity;
import android.os.Bundle;
import android.view.Menu;
import android.widget.TabHost;

public class MainActivity extends Activity{

@Override
protected void onCreate(Bundle savedInstanceState) {
super.onCreate(savedInstanceState);
setContentView(R.layout.activity_main);

TabHost tabs = (TabHost)findViewById(R.id.tabhost);
tabs.setup();

TabHost.TabSpec spec = tabs.newTabSpec("tab1");

spec.setContent(R.id.content1);
spec.setIndicator("Page 1");
tabs.addTab(spec);

spec = tabs.newTabSpec("tab2");
spec.setContent(R.id.content2);
spec.setIndicator("Page 2");
tabs.addTab(spec);

spec = tabs.newTabSpec("tab3");
spec.setContent(R.id.content3);
spec.setIndicator("Page 3");
tabs.addTab(spec);

tabs.setCurrentTab(0);
}

@Override
public boolean onCreateOptionsMenu(Menu menu) {
// Inflate the menu; this adds items to the action bar if it is present.
getMenuInflater().inflate(R.menu.activity_main, menu);
return true;
}

}
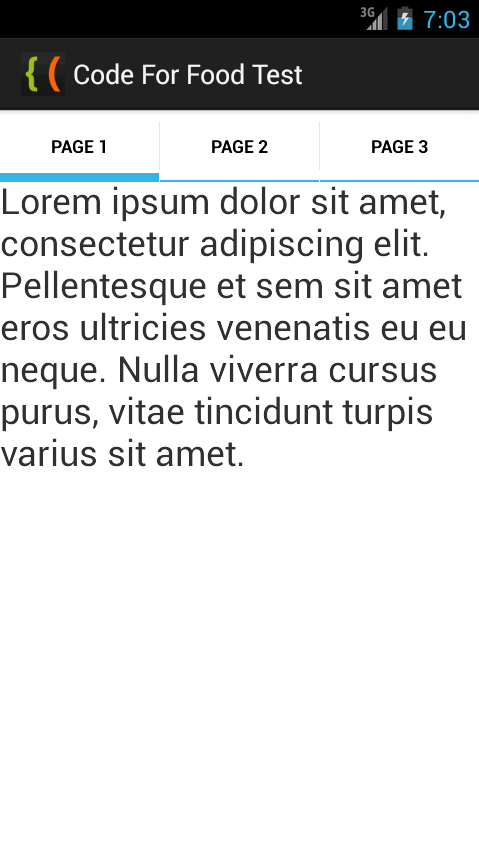
Test your application and it should look something like this:
Thanks for reading!
Subscribe to:
Post Comments (Atom)
No comments:
Post a Comment
Note: Only a member of this blog may post a comment.